

Invoicing basis
Invoice hours reported on projects or costs that are invoiced on to customers
Invoice your customers for the billable hours reported on projects, and for costs that are invoiced on.
Find the invoicing basis in the system
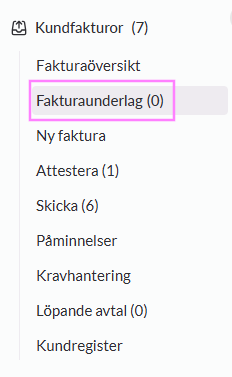
You find the invoicing basis in the left-hand menu, under Customer invoices, as Time & Expense billing. Users who have permission to create their own customer invoices can access this page.
What ends up in an invoicing basis?
What ends up in an invoicing basis is
- Billable hours that are reported on a project
- Expenses that are invoiced on, either to a customer or to a project
- Supplier invoices that are invoiced on, either to a customer or to a project
For them to show up, the hours, expense journal or supplier invoice must be authorised.
Filtering and search options
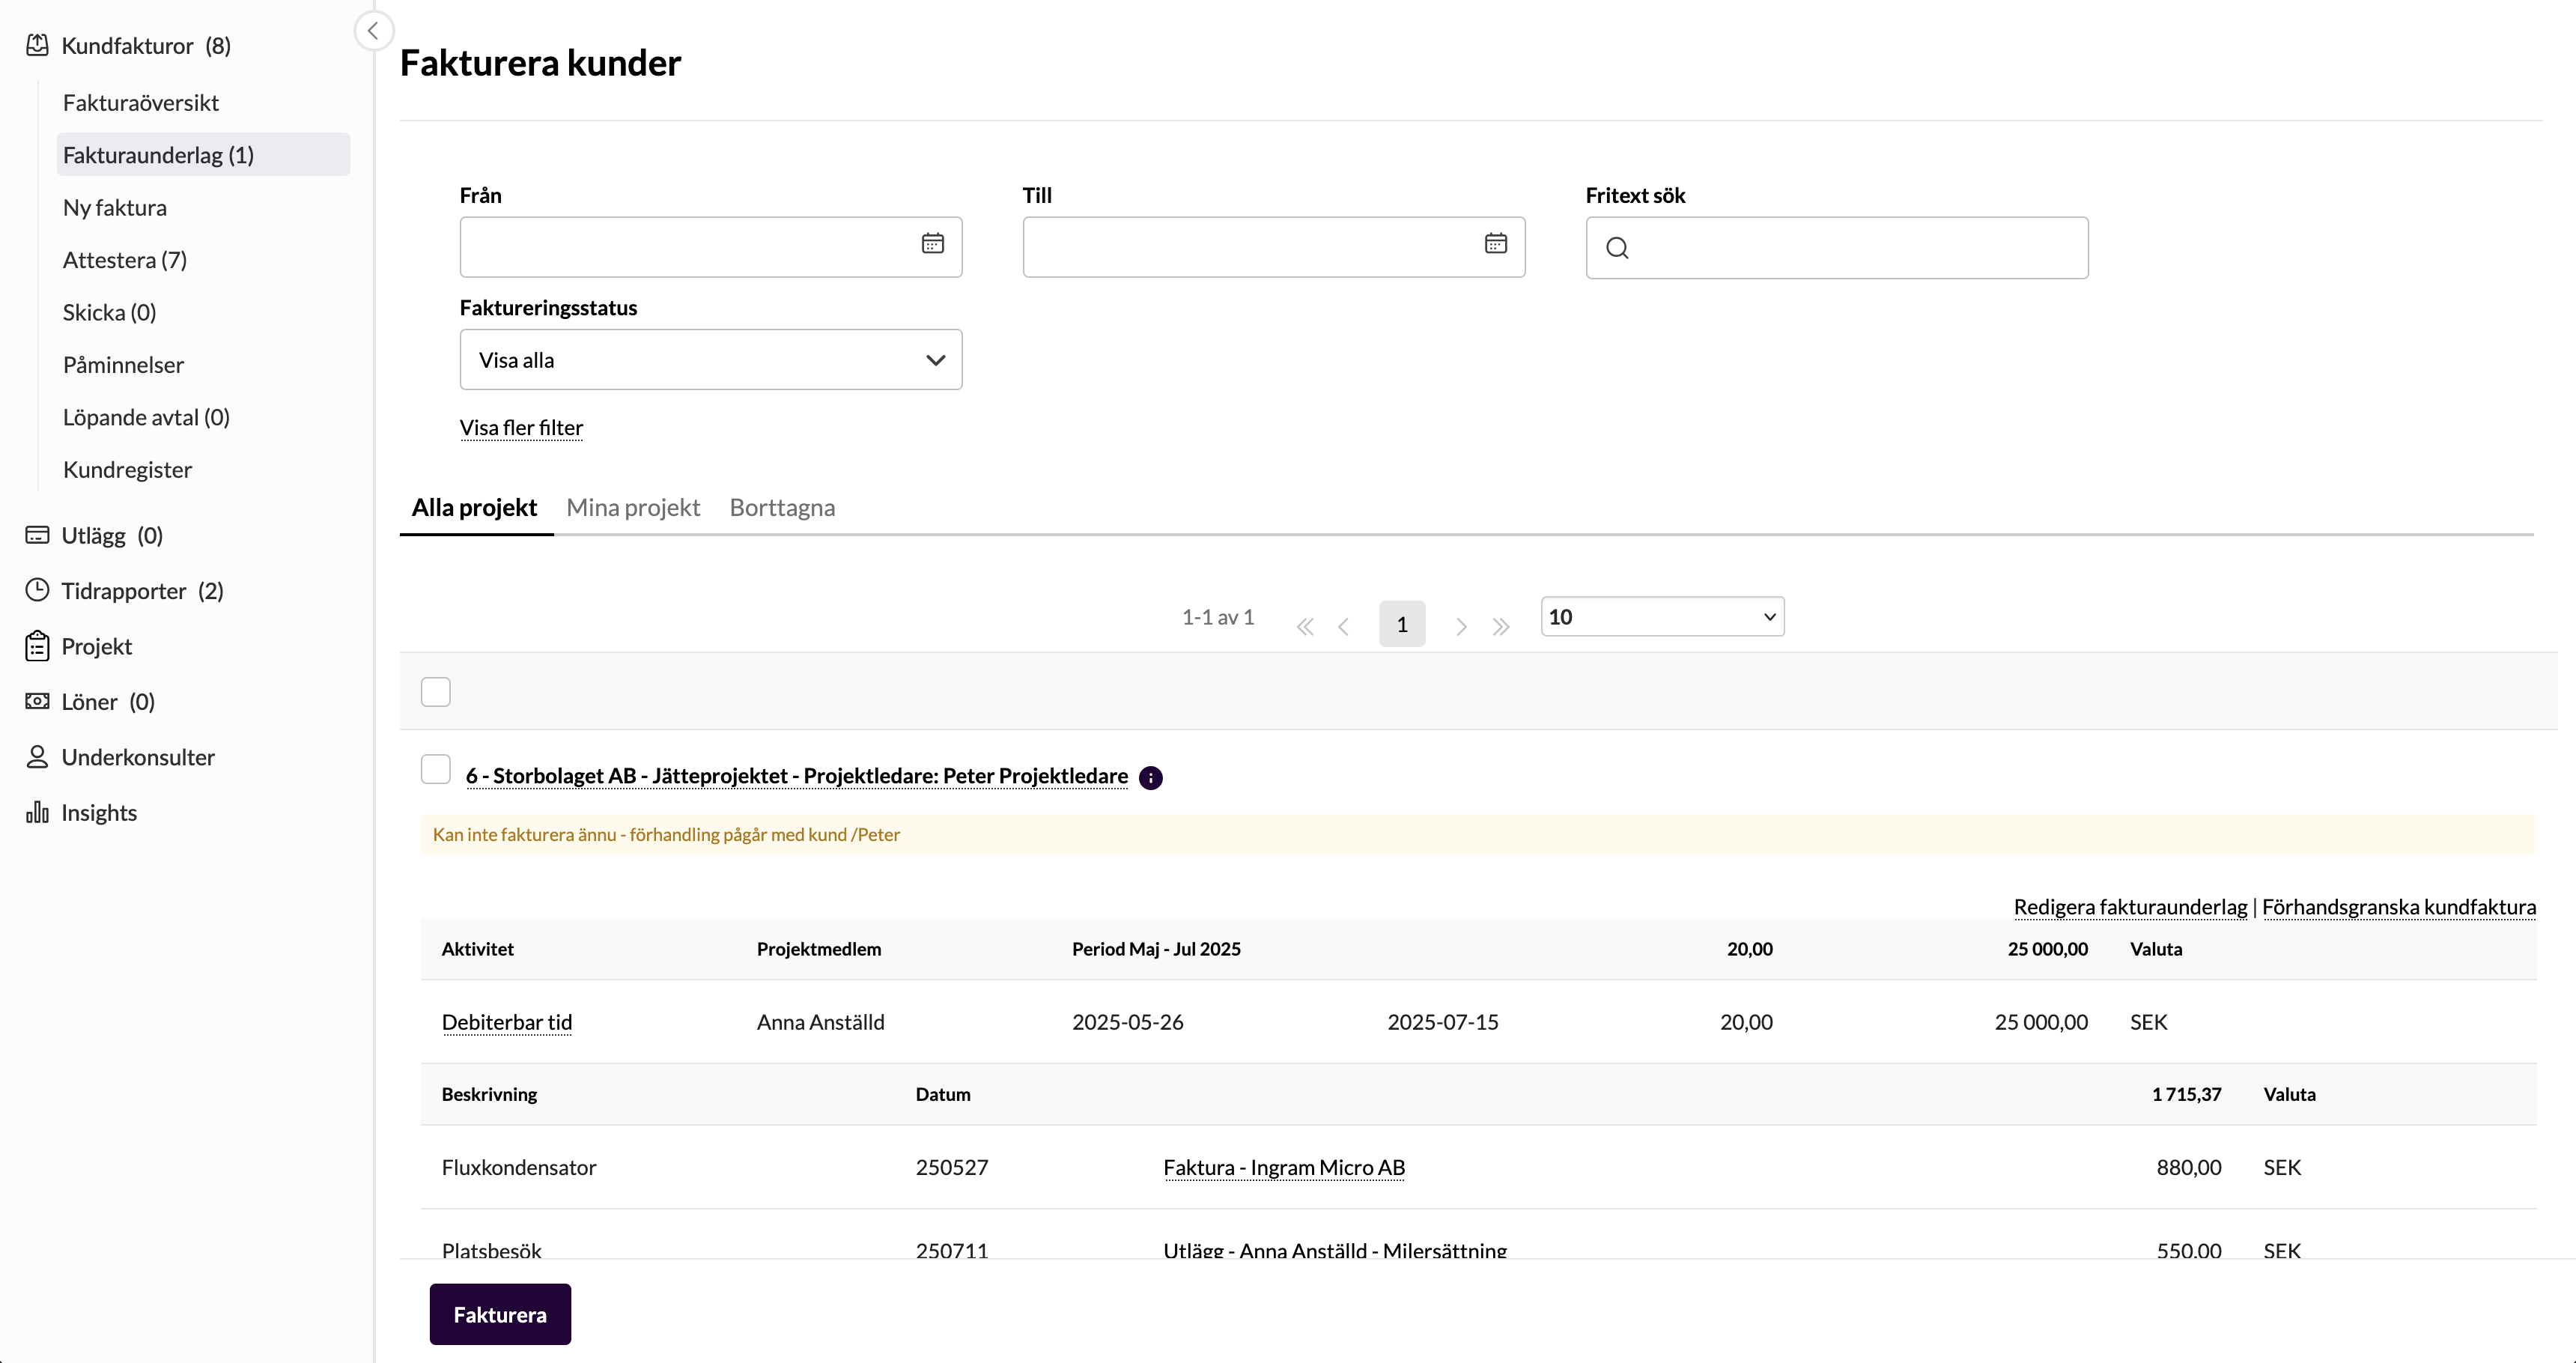
- You can filter on a basis within a certain date range, or search with free text
- In the drop-down Invoicing status you can choose to see all projects, or only projects with or without a comment about invoicing status (see the section on Edit basis for invoice)
- Click Show more filters to show all the options, including customer and project manager
- The filters are kept in the address of the page. You can therefore save a filtered view as a bookmark or send the link to a colleague, who sees the same selection if they have permission to it. The back button takes you back to the selection you left. Clear all filters clears only the page you are on. If you switch company, the filters are cleared.
Editing options
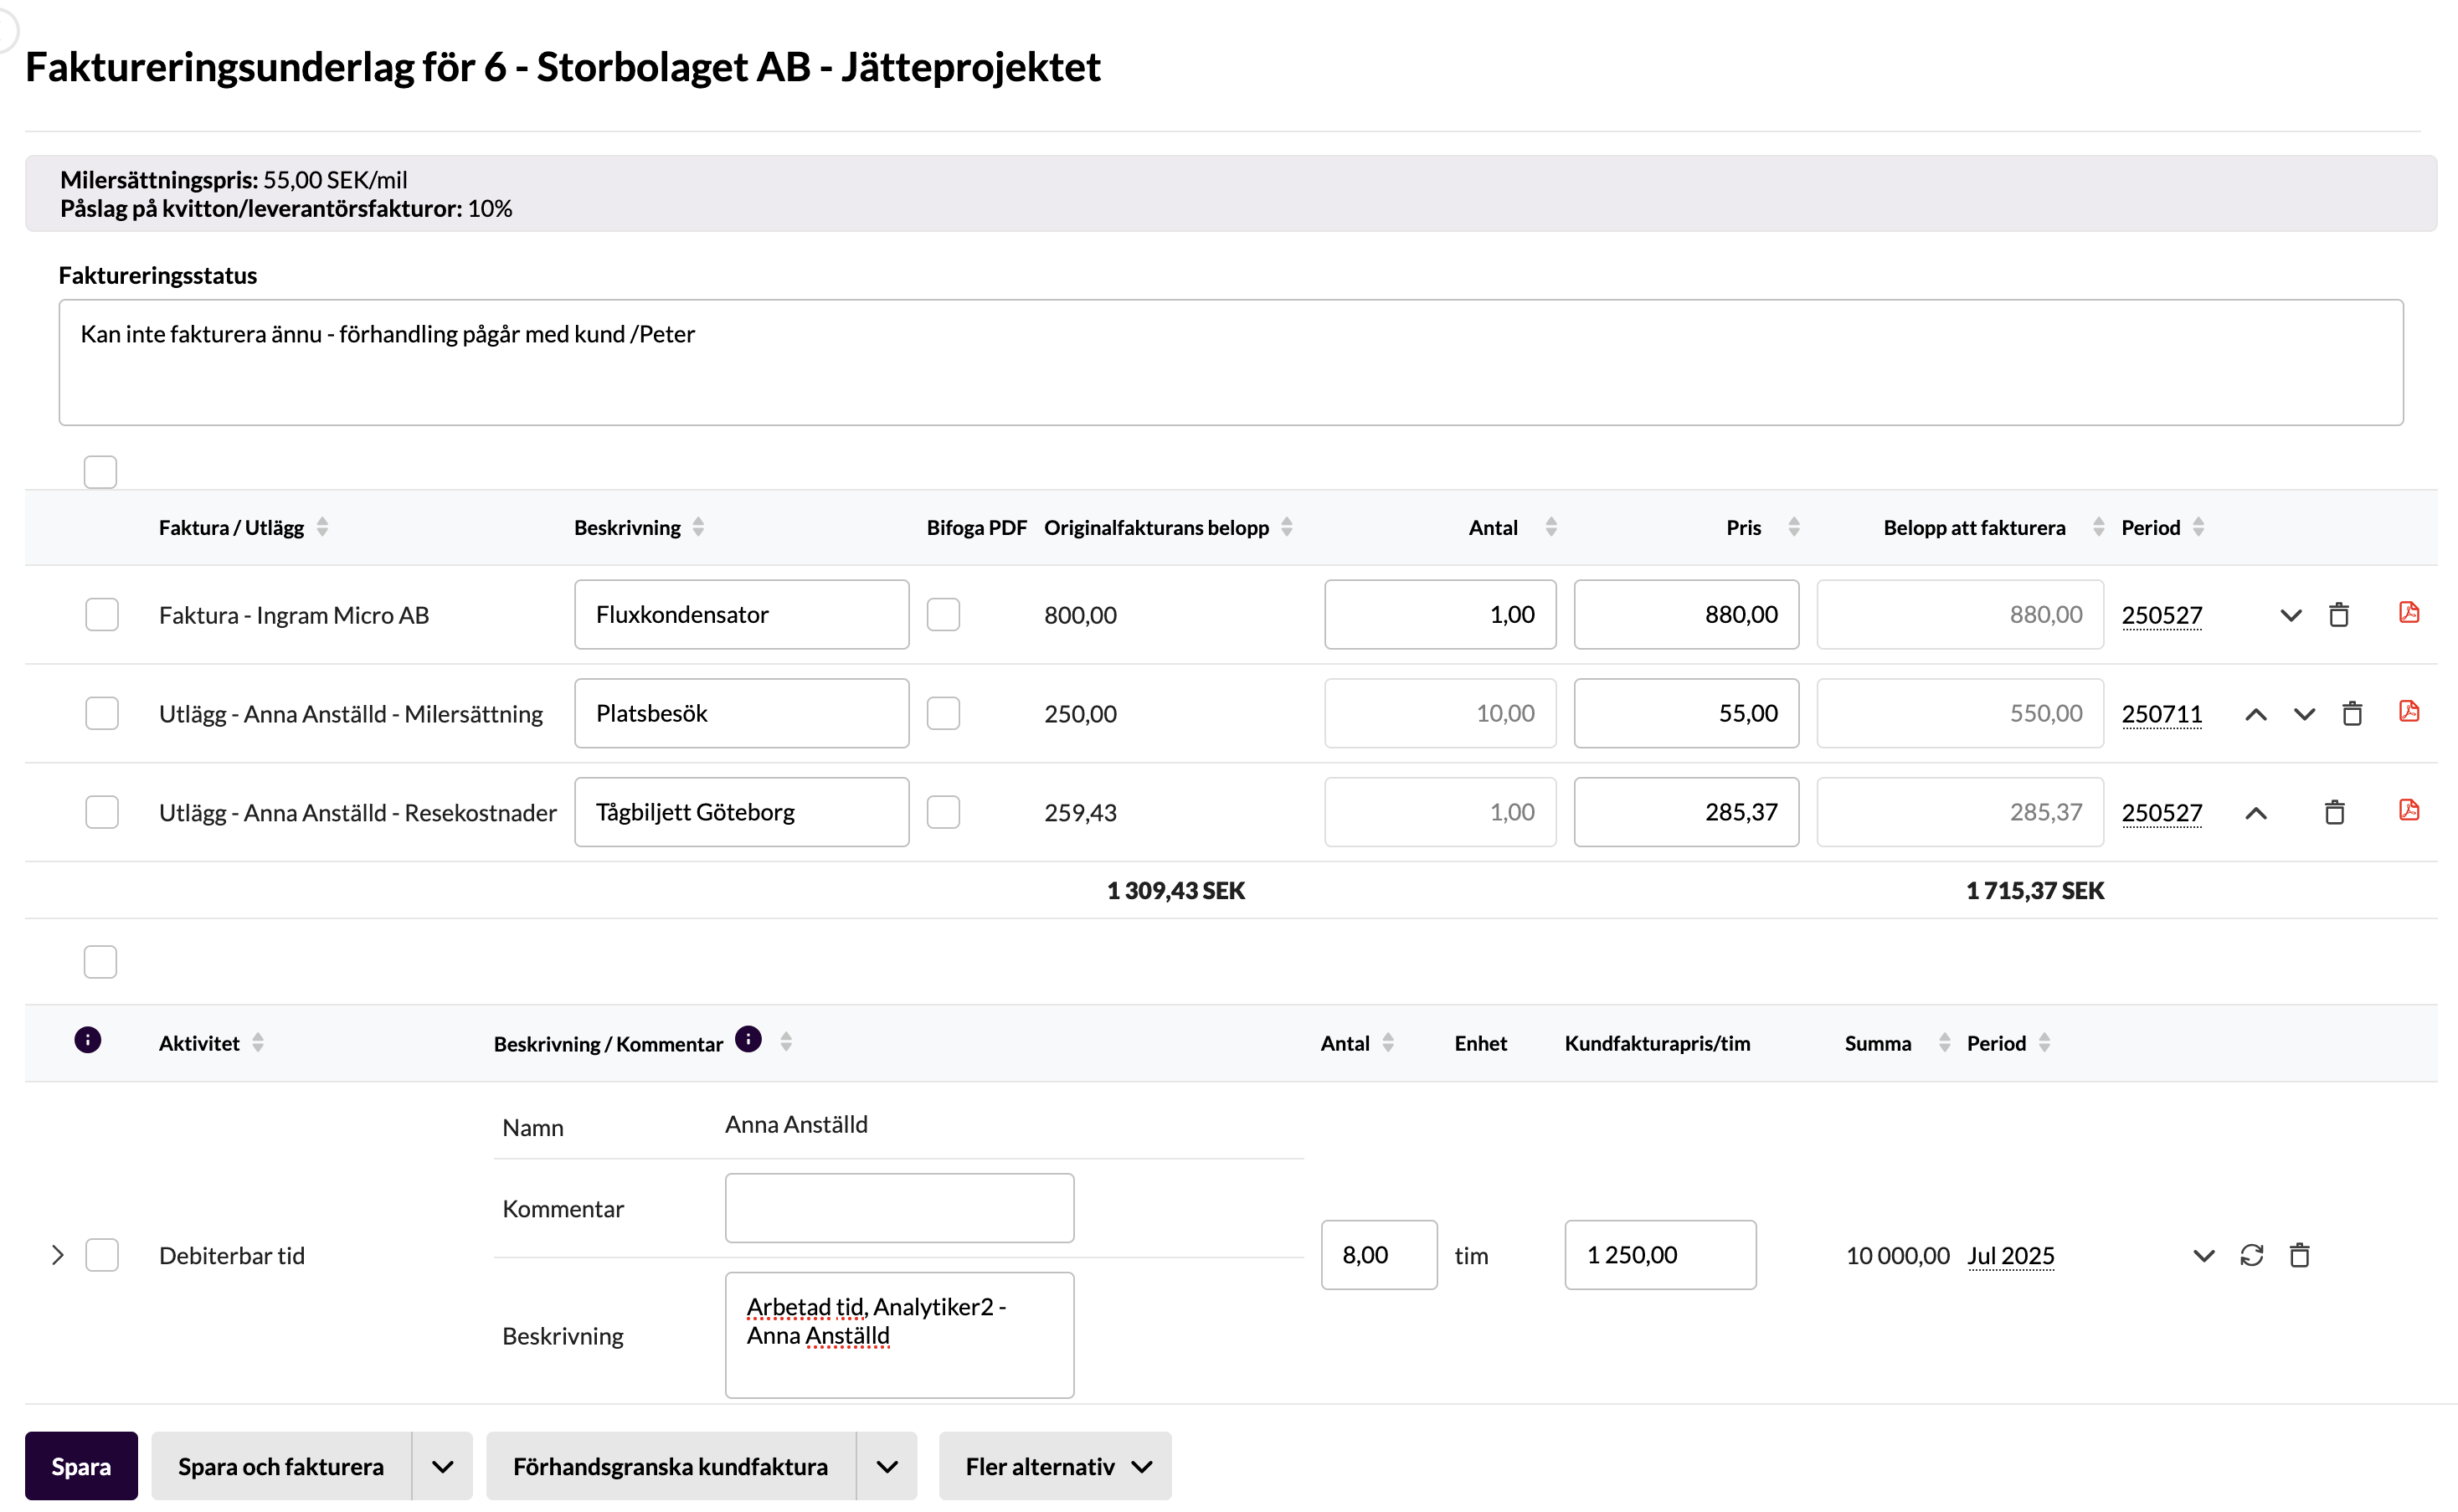
By clicking Edit basis for invoice on the right of each basis in the overview, you can make certain changes before the customer invoice is created.
You can also change the order the rows come in on the invoice, with the arrows.
If you tick the box Attach PDF, the receipt or invoice that is invoiced on is included as an attachment to the customer invoice.
If you enter some text in the field “Invoicing status”, it is shown as a yellow box on the overview page, see the previous screenshot. (The text stays until it is removed manually, even if the project is invoiced. It is then shown again when a new invoicing basis appears.)
Invoice
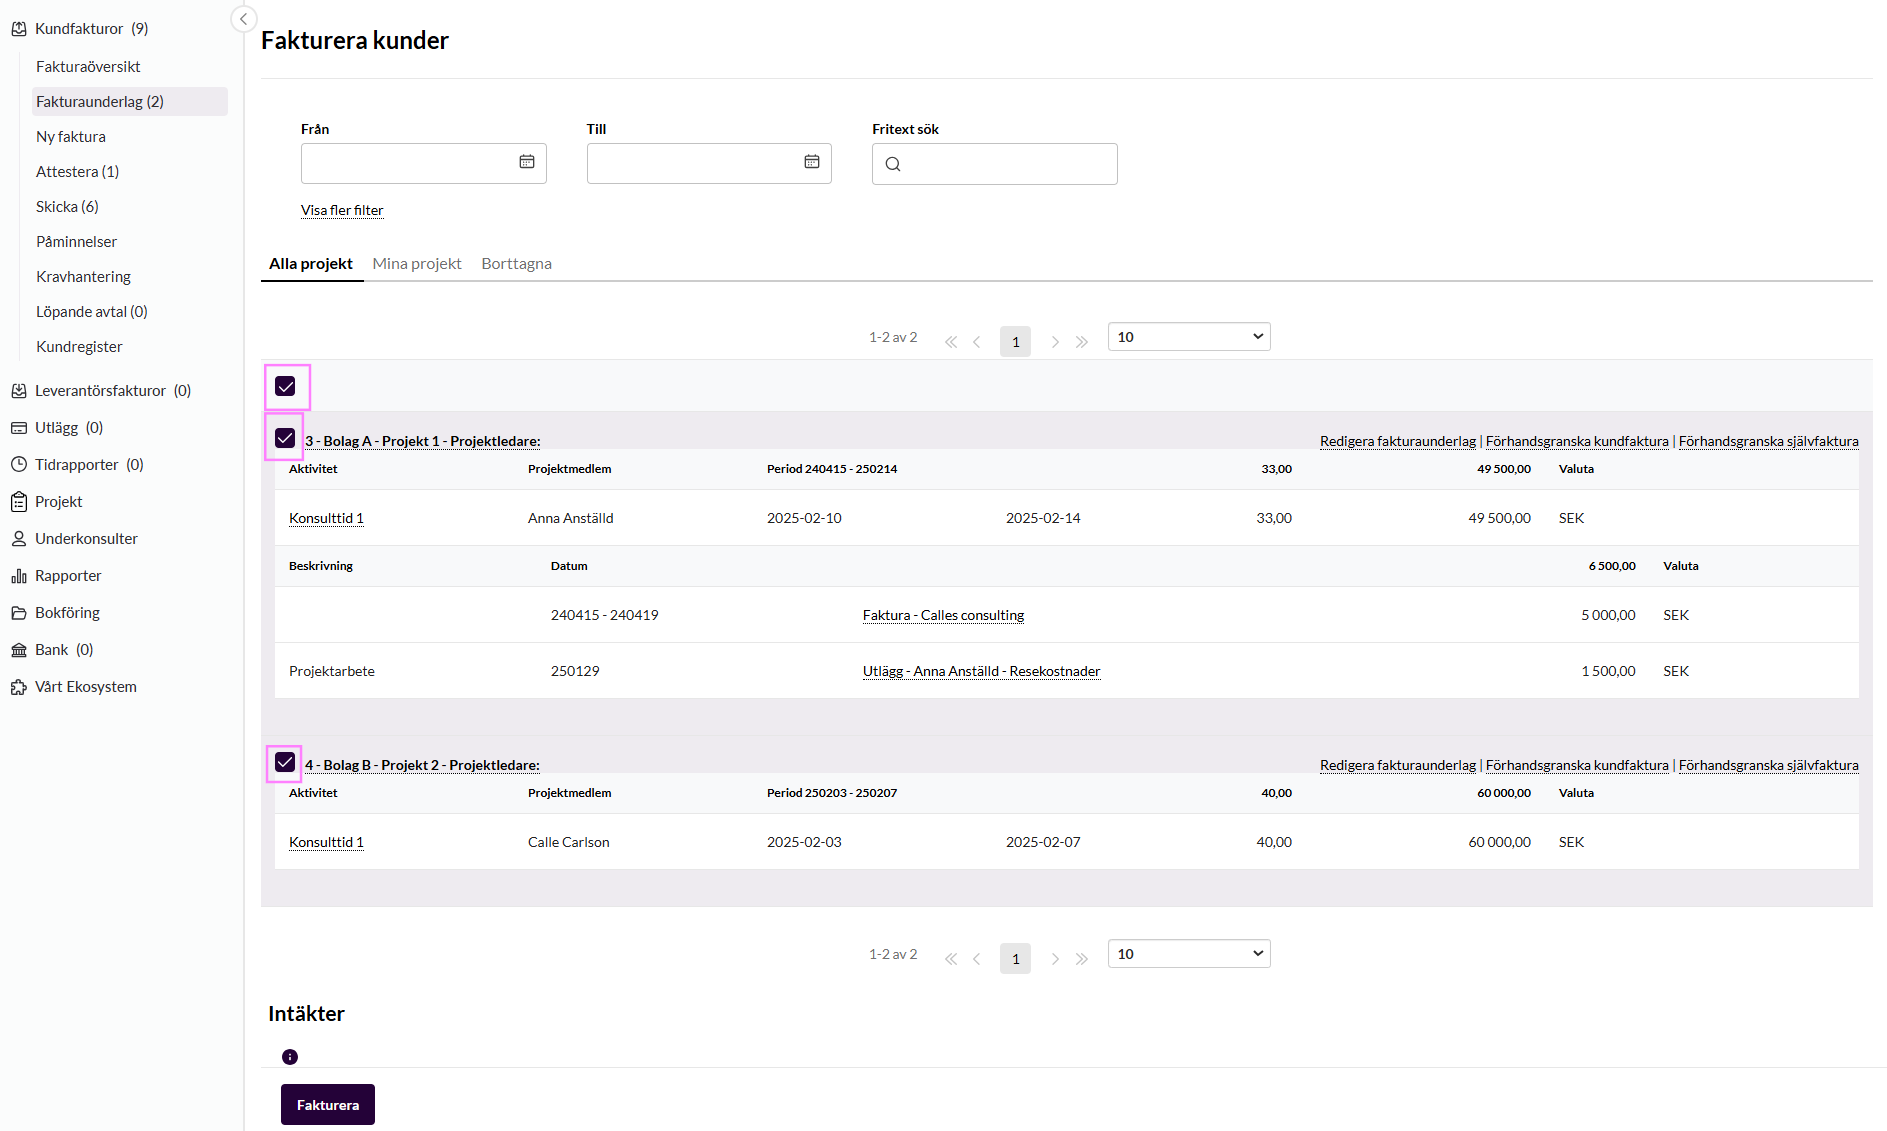
When your invoicing bases are ready to be invoiced, tick the box on the left of the row and then click the button Invoice. If you want to invoice all bases, tick the top box and check that all invoicing bases become marked.
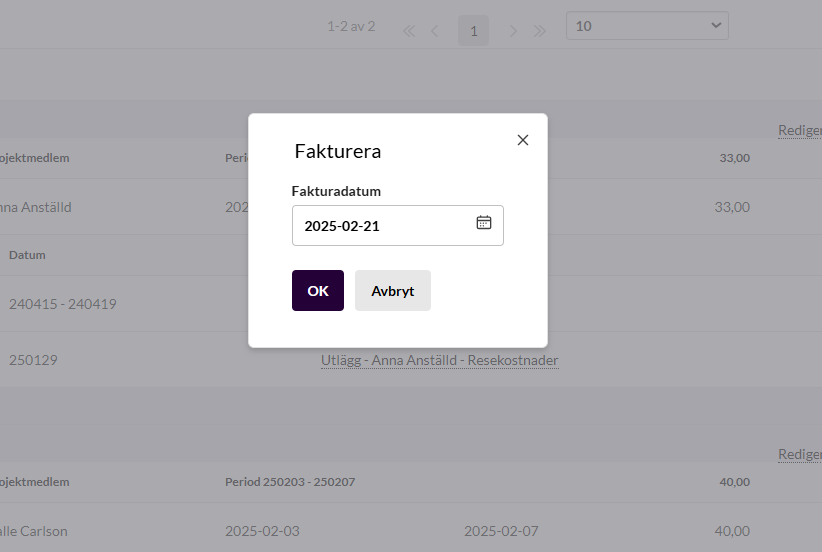
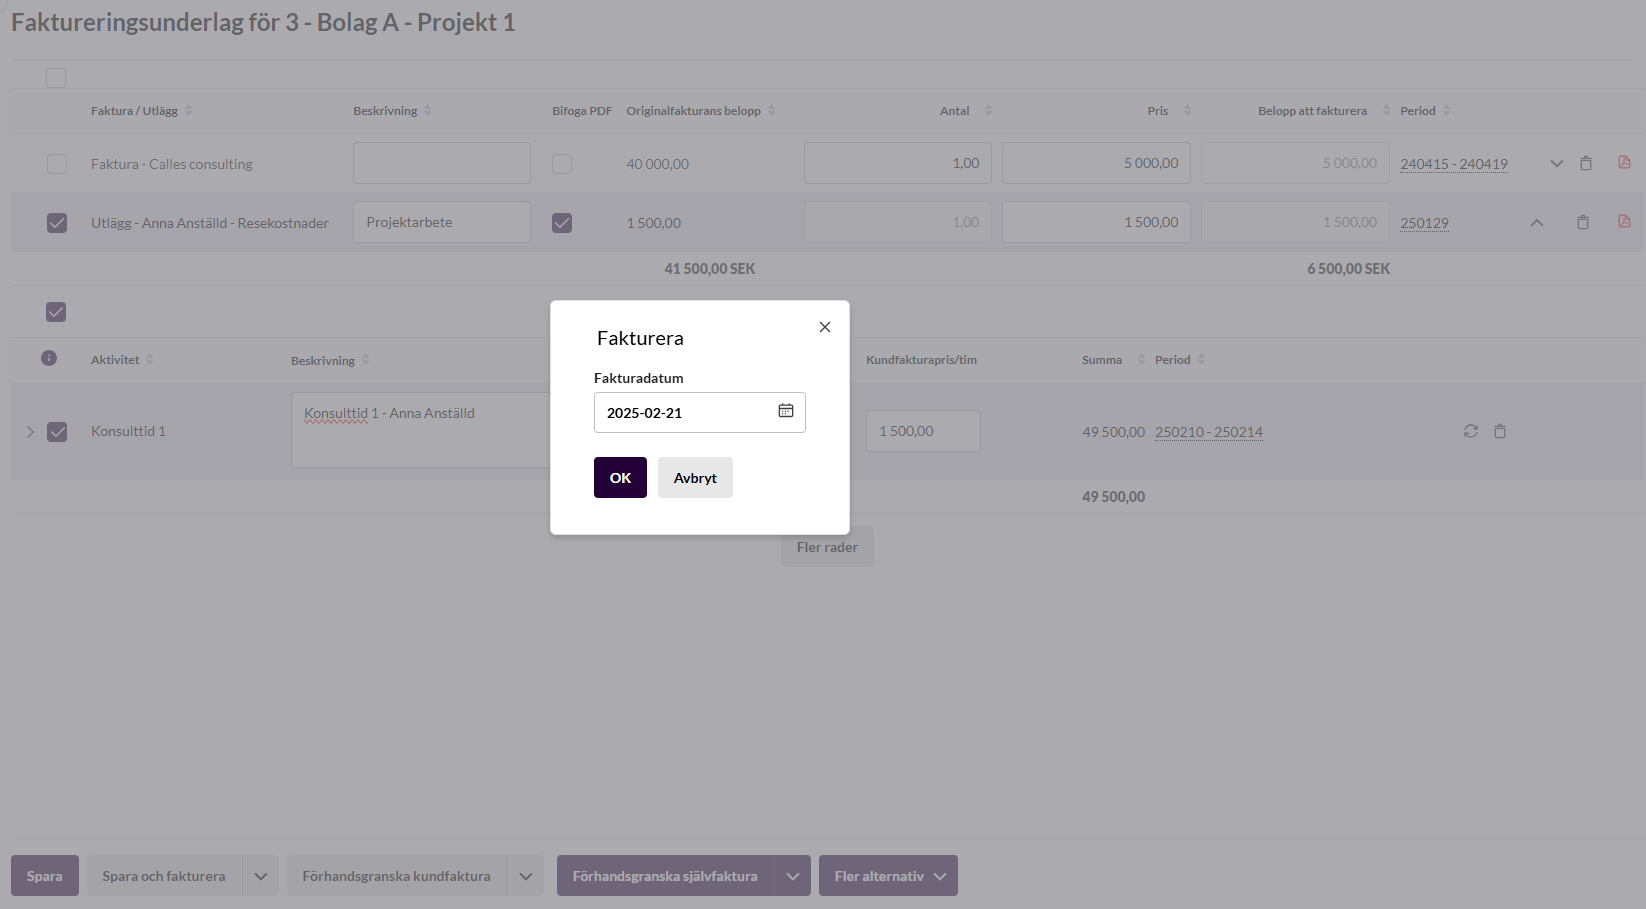
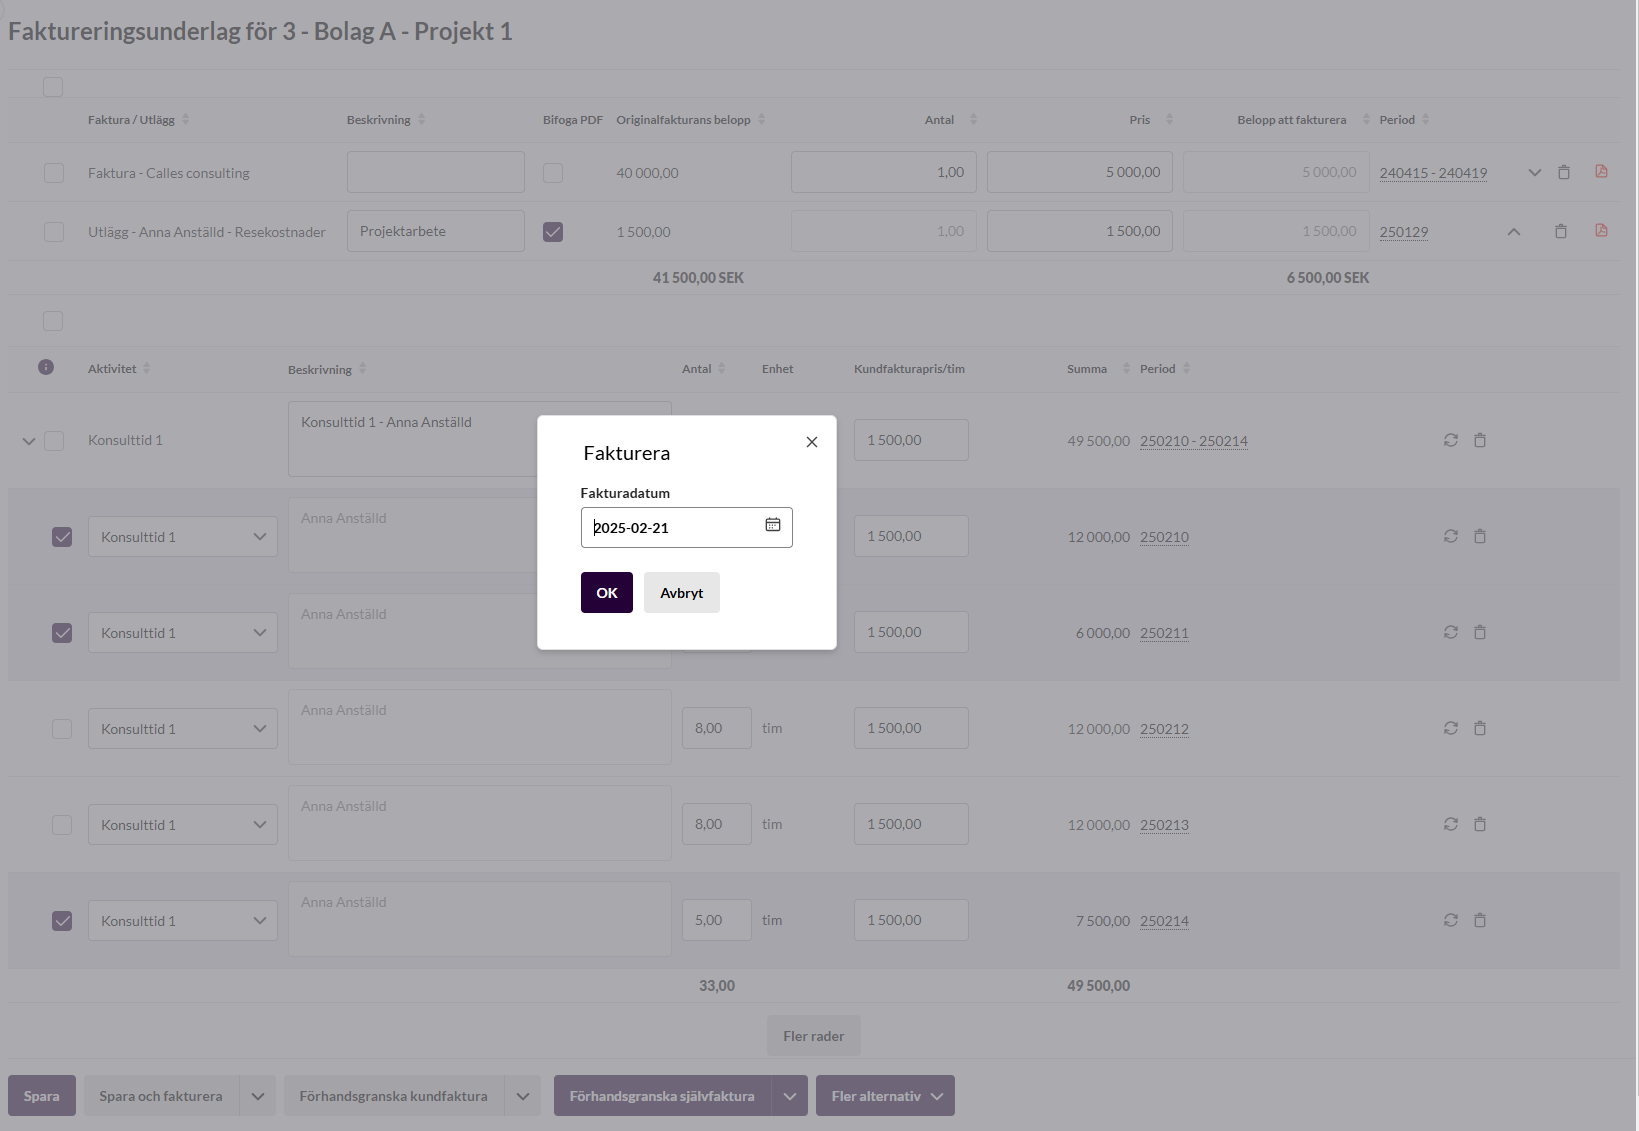
In the box that appears, select the invoice date.
Invoice parts or rows of an invoicing basis
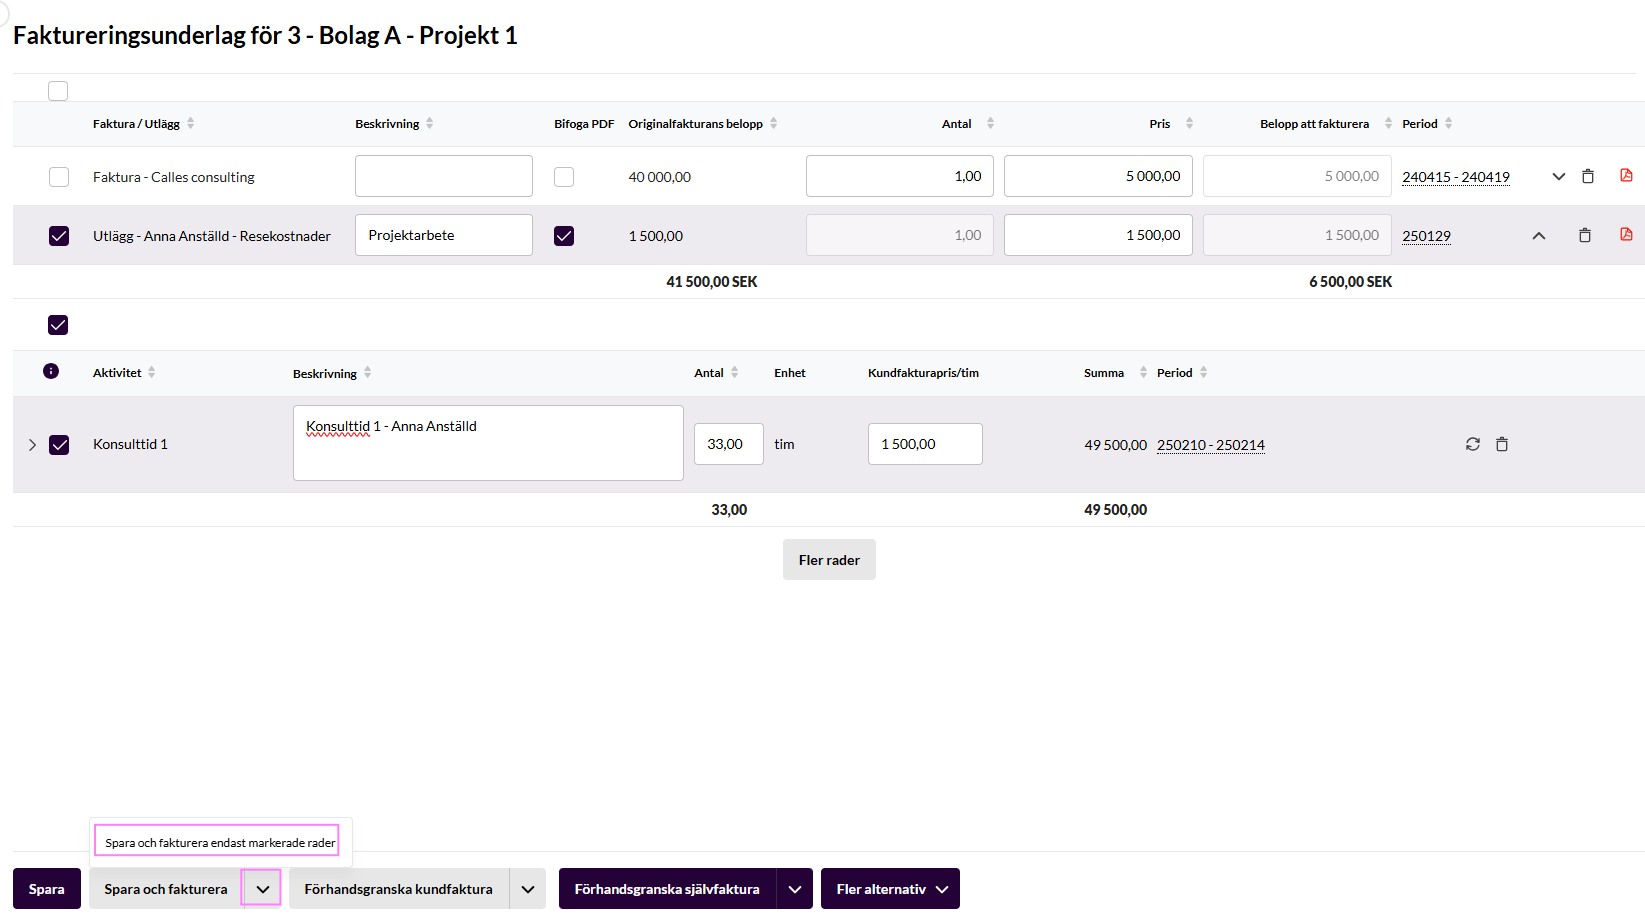
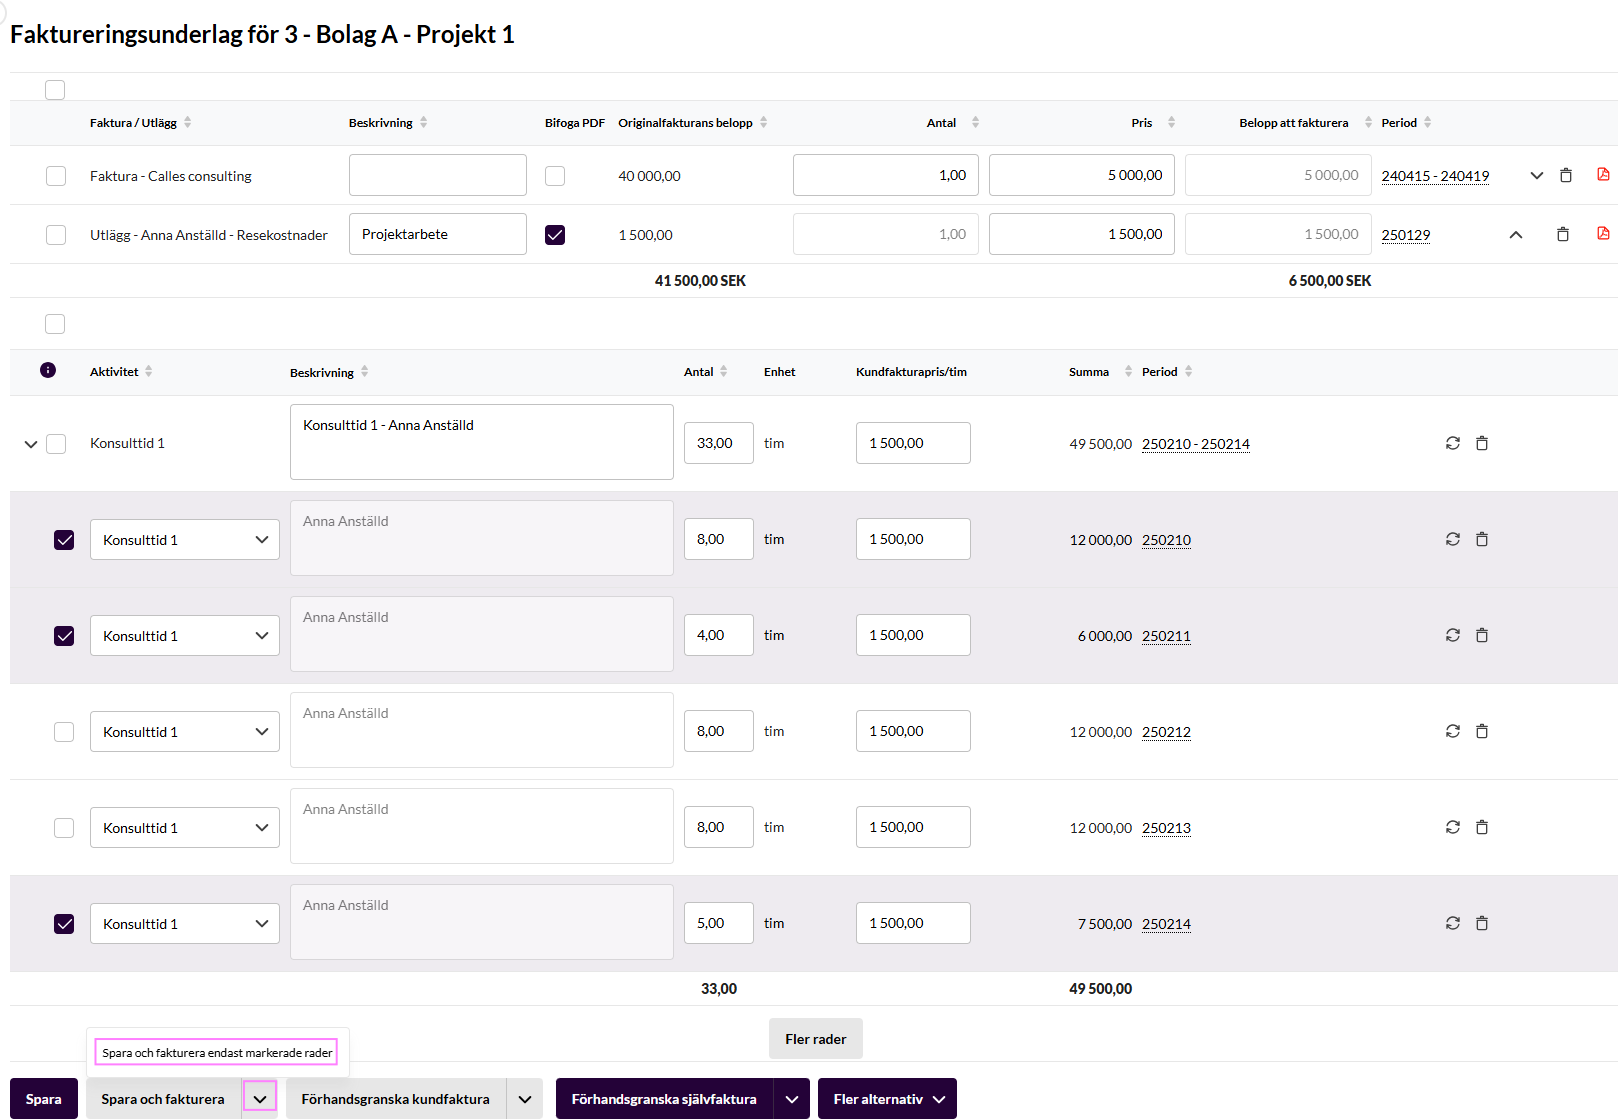
Sometimes you only want to invoice certain parts of what is in an invoicing basis. You can then tick the rows you want, click the arrow next to “Save and invoice” and choose “Save and invoice only rows duly marked”.
Option 1: Create new groupings
Click into Edit basis for invoice
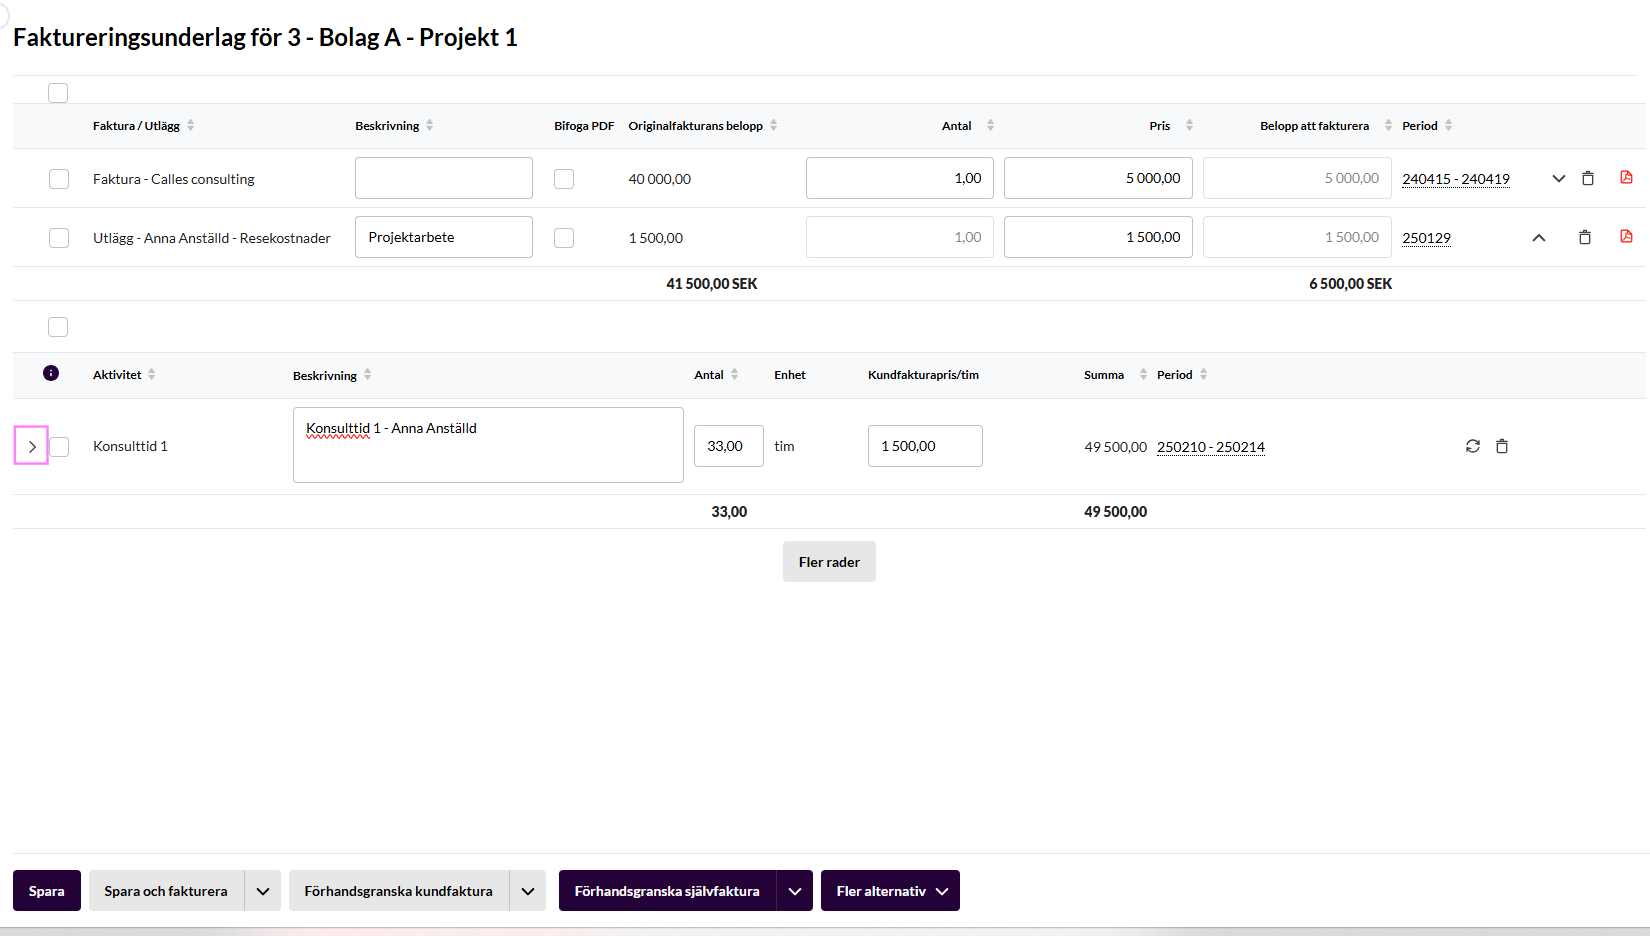
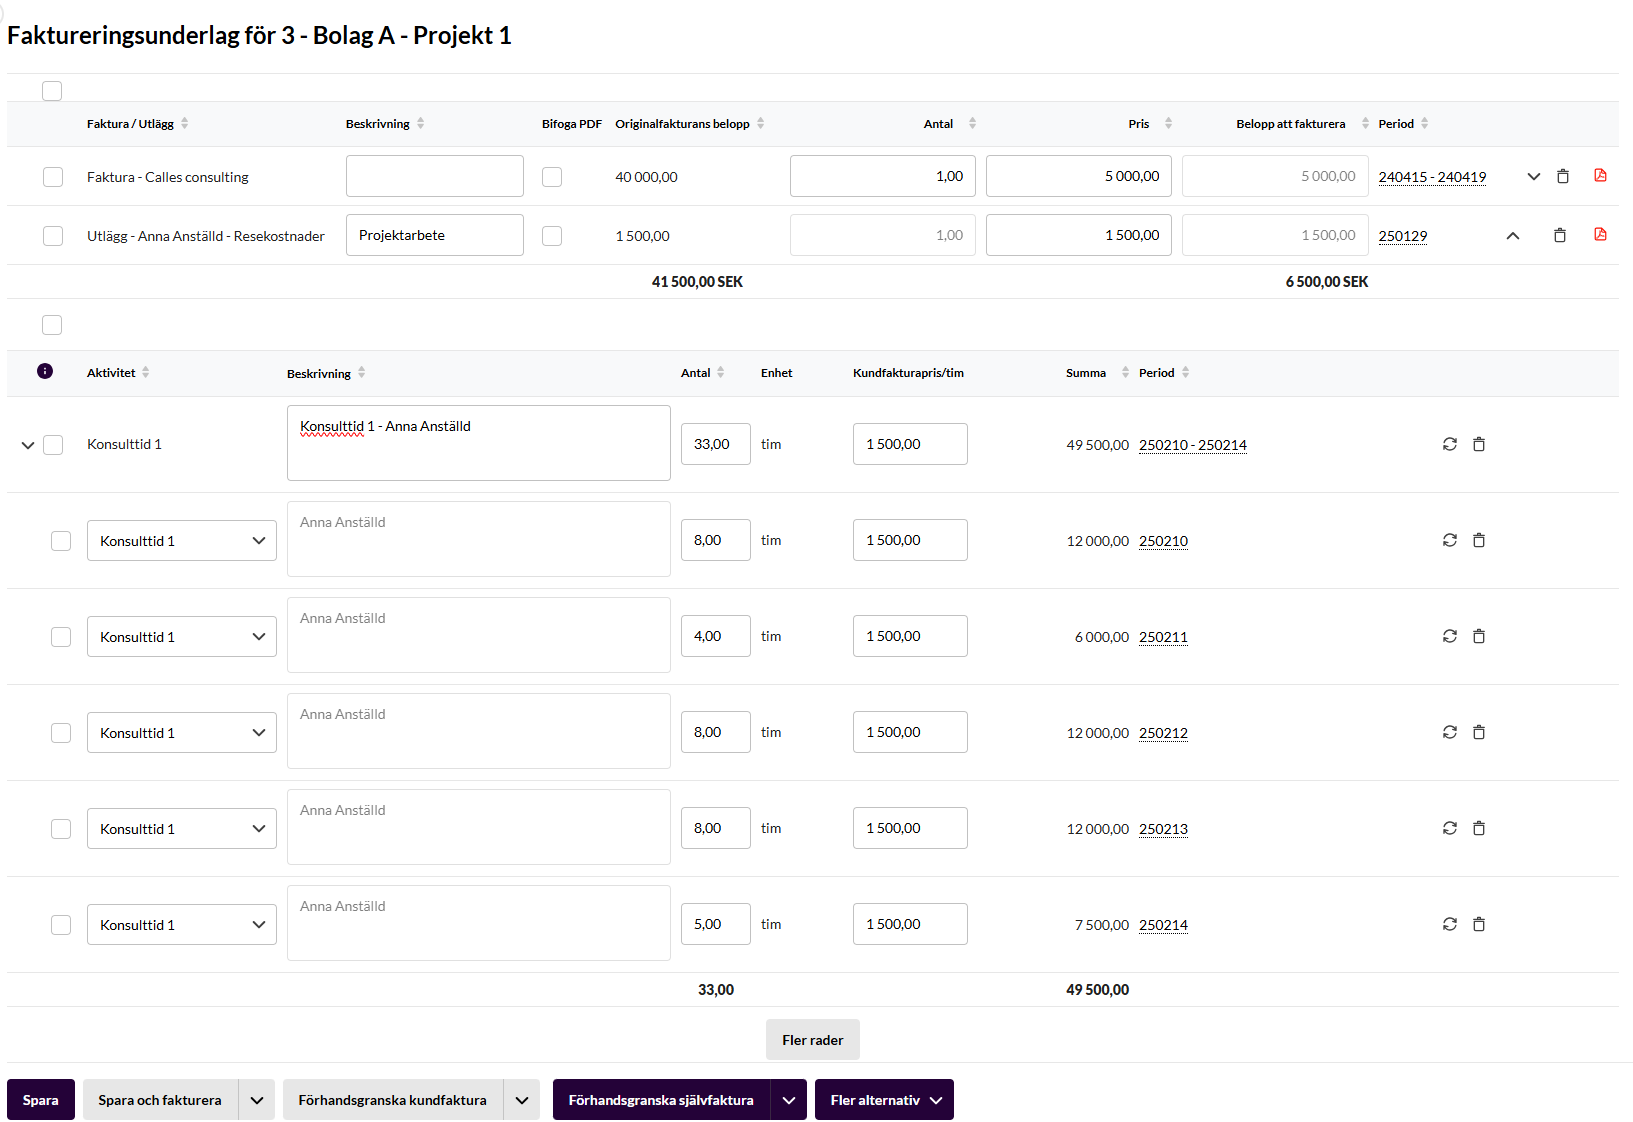
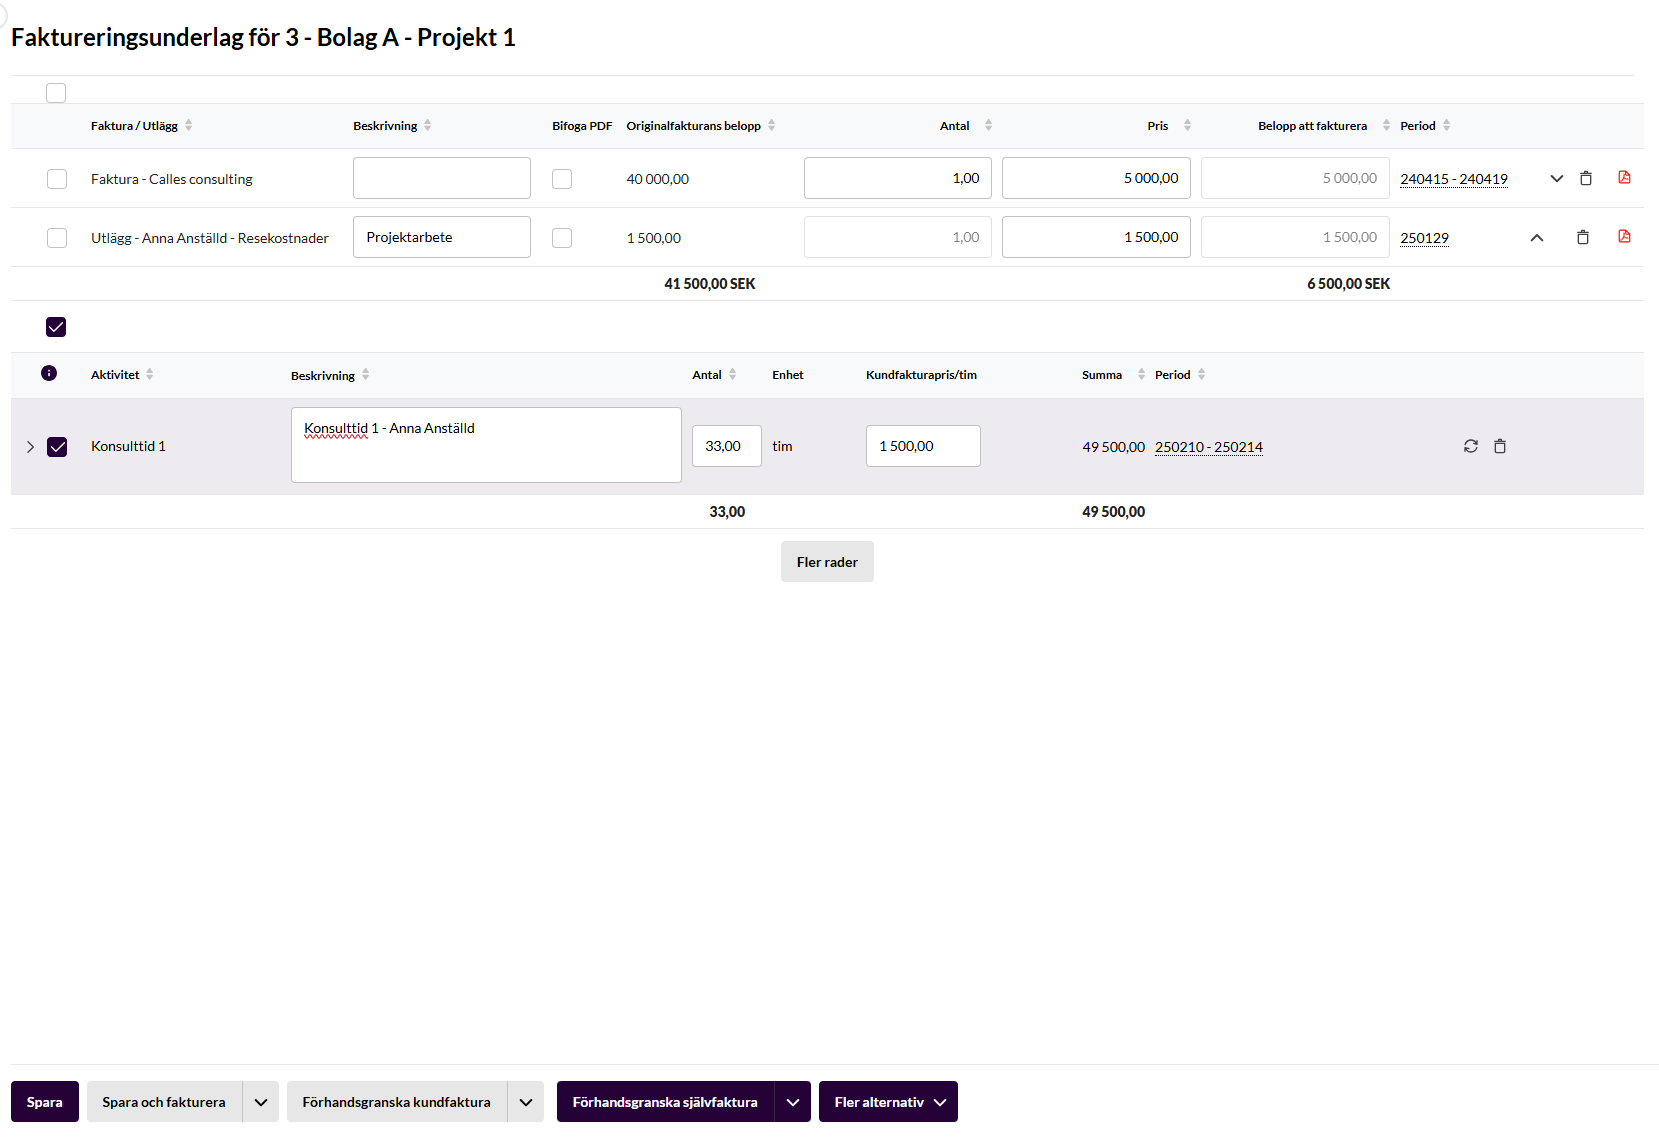
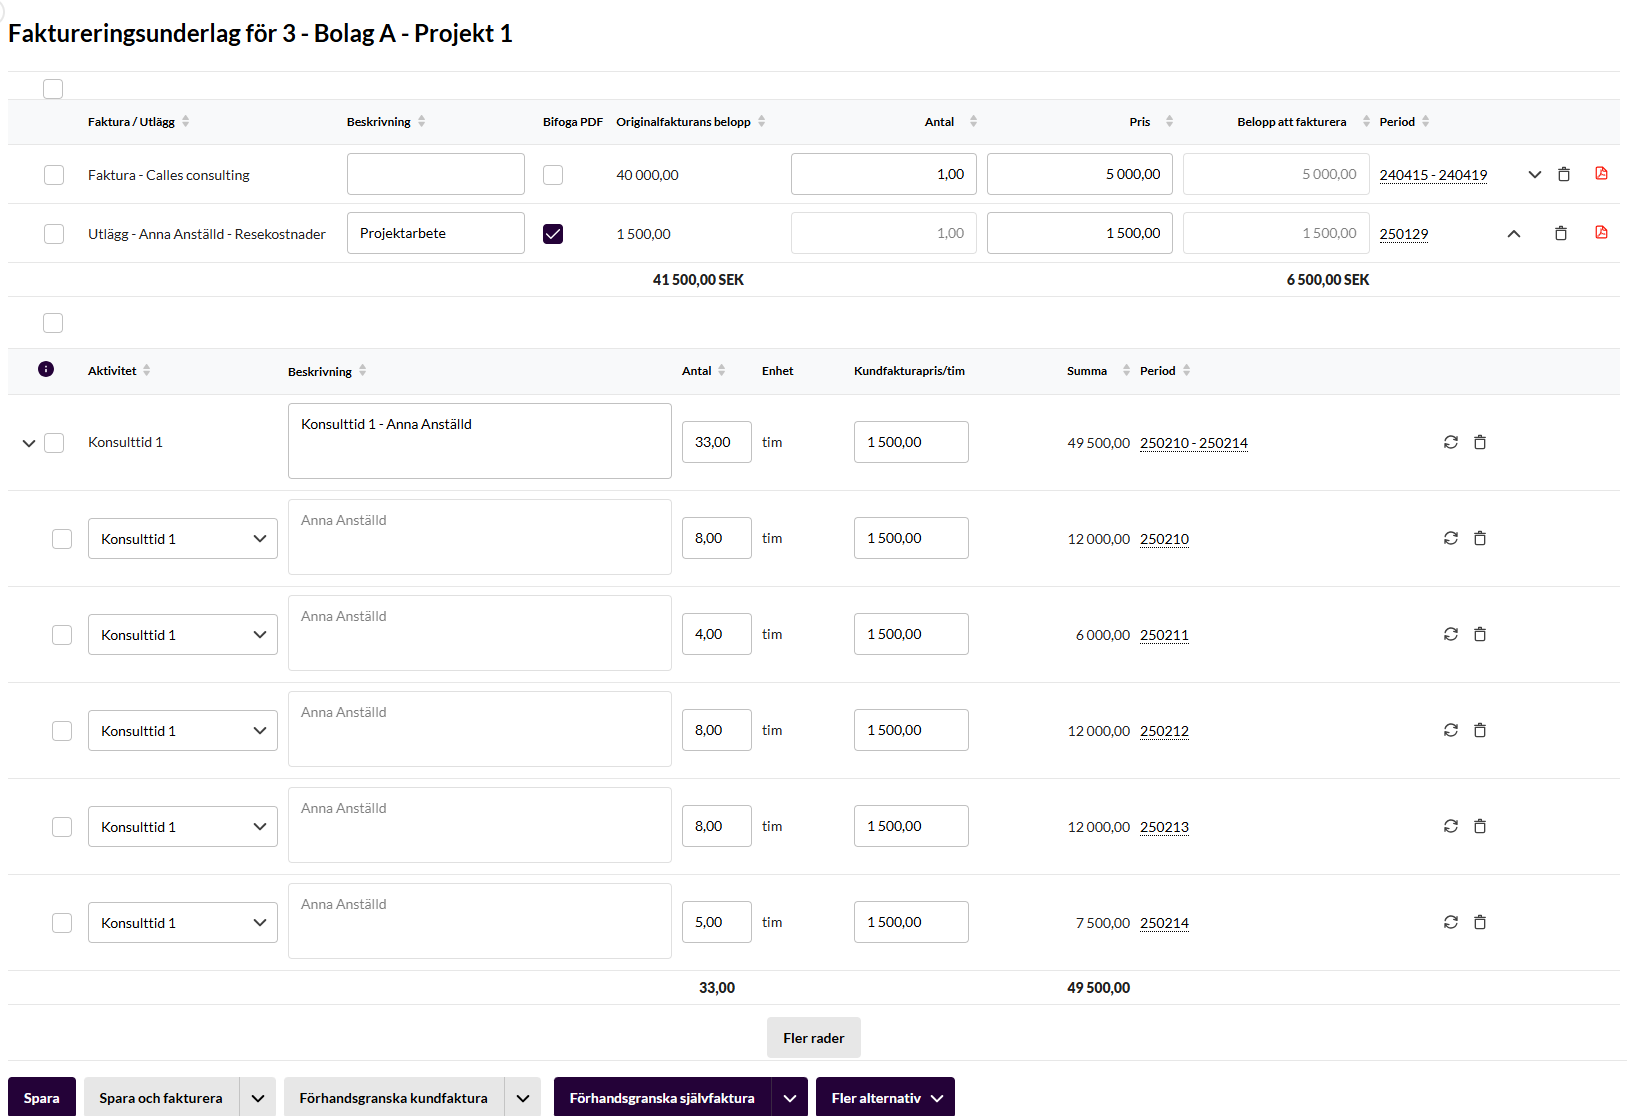
In this example there are three groupings of time reports. They are marked by an arrow furthest to the left on the row.
Click the arrow and the time report expands, so you can see each day’s reporting.
If only some of the days are to be invoiced, a new group must be created, since only whole groups or rows that are not part of a group can be invoiced.
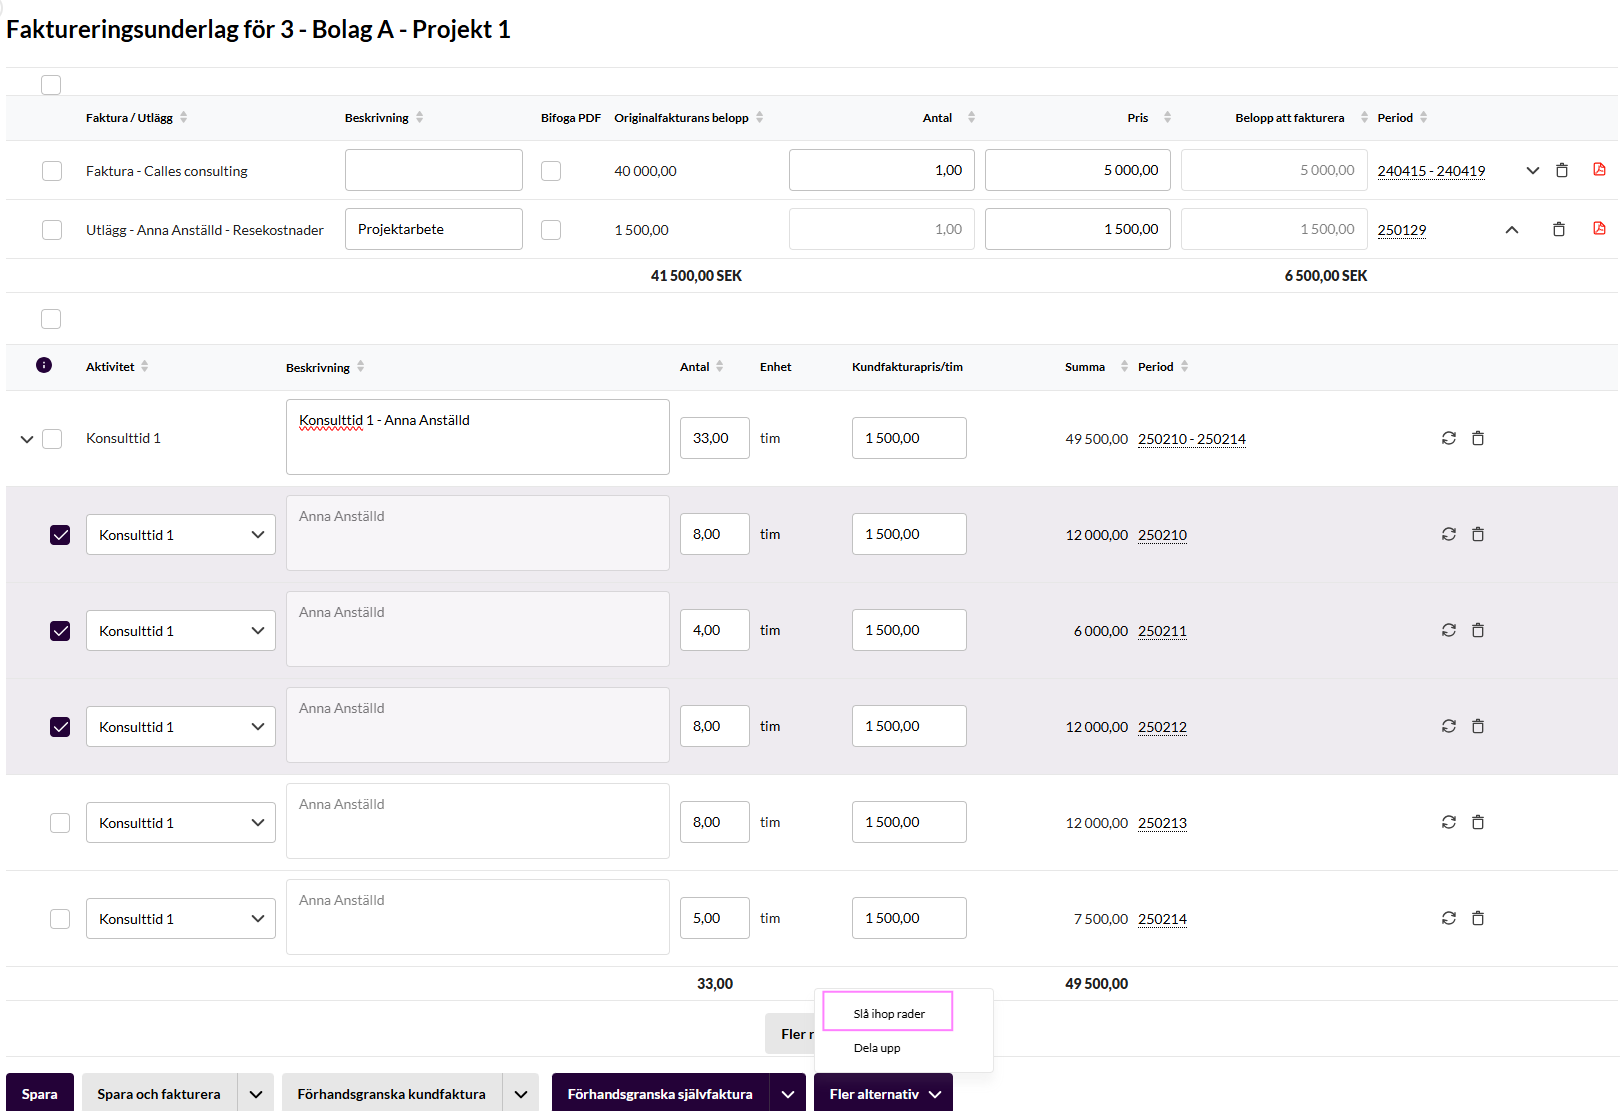
Select the rows that should be on the invoice.
Click More options at the bottom of the page, select Merge lines
A new grouping has now been created that you can choose to invoice, and the other group can stay in the invoicing basis until later.
Select the new group (and possibly more groups, invoices or expenses) and click the arrow next to Save and invoice, then select Save and invoice only rows duly marked.
Select the invoice date and the invoice is created.
Option 2: Break up a grouping
You can also split groupings instead of creating new ones, to be able to invoice a subset of the reported hours.
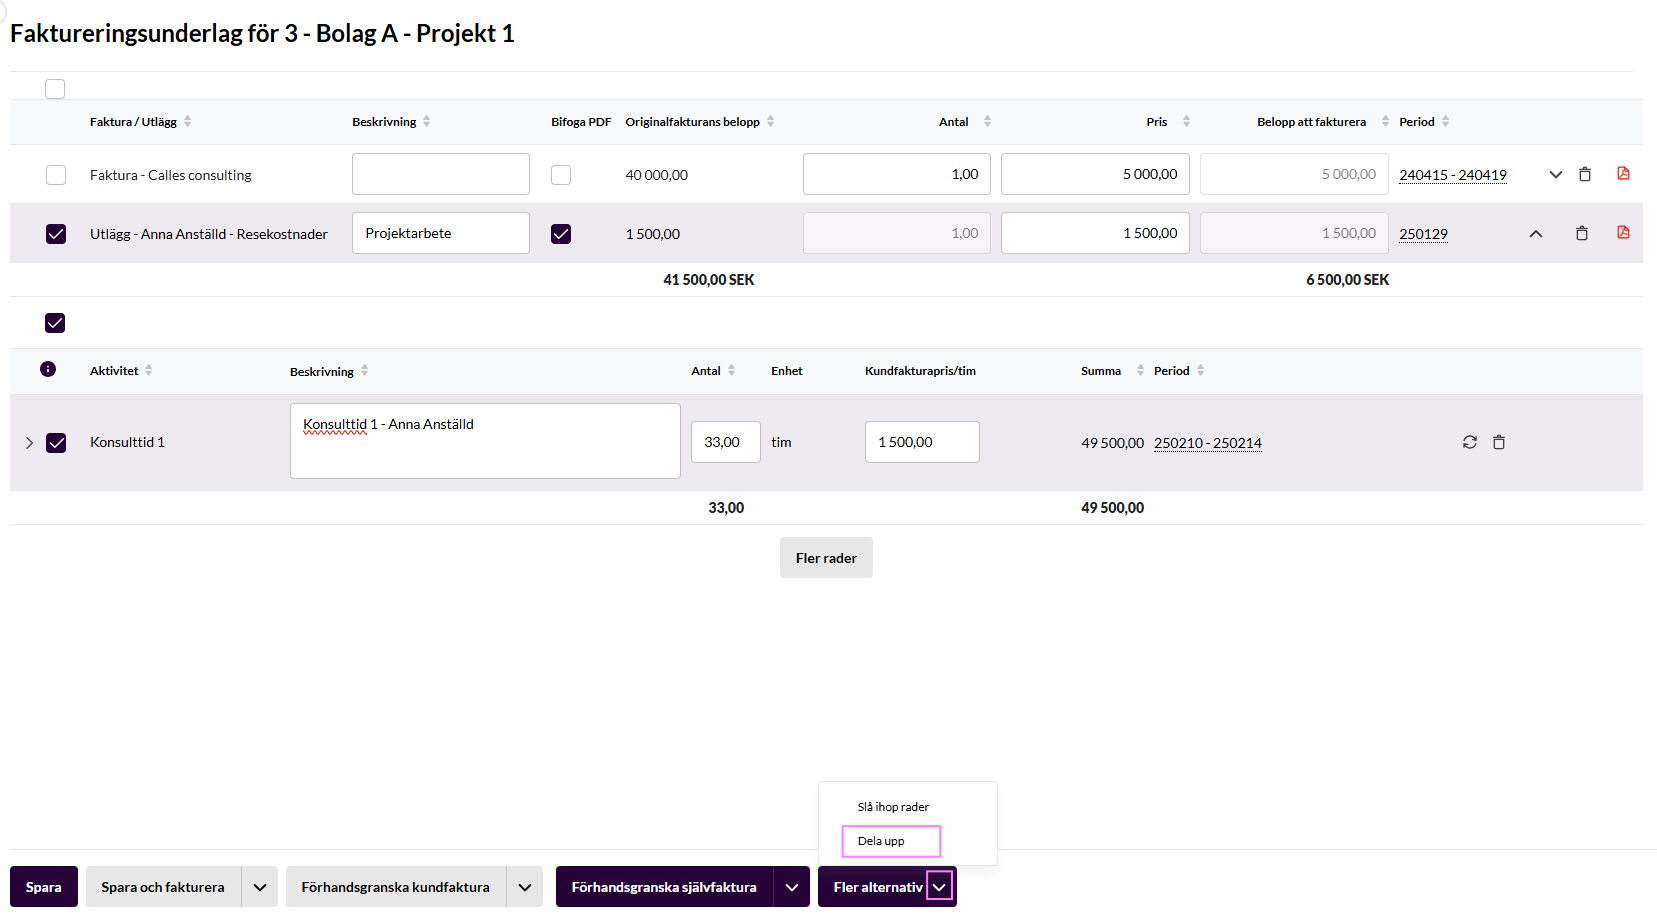
Select the grouping you want to split. You can also select all of them if you like. Click the button More options > Split.
The rows now stand alone and you can freely choose which ones to invoice.
Select the rows to be invoiced (and possibly more groups, invoices or expenses) and click the arrow next to Save and invoice, then select Save and invoice only rows duly marked.
Select the invoice date and the invoice is created.