

Get started and administrate authorisation flows for supplier invoices
Guide for Finance Managers regarding how authorisation flows work and are administred in Kleer
Authorisation flows for
supplier invoices
A supplier invoice route through Kleer

Approval
The first step in the process of handling an incoming supplier invoice is called approval.
This step is usually done by the person who has bought something for the company. A check to make sure what has been ordered also has been delivered according to agreement.
The approver is appointed in the following order of priority;
-
The user who is stated as Your referens on the invoice.
-
The user who is stated as Your reference in the supplier register.
-
The user who is manually sent the invoice by an administrator.
-
All users in Kleer can be approvers.
-
Approval is done before authorisation and it is not included in the authorisation flows that are created.
Authorisation
Once the approval has been made the invoice will be sent to the first person in the authorisation flow for authorisation.
This step is usually done by persons who have the right to accept a cost in the company. They assure that the amount is within budget and that they are willing to accept the cost.
The authorisation flow is appointed in the following order of priority;
-
The authorisation flow that is stated in the supplier register.
-
The standard authorisation flow.
-
The authorisation flow that is manually chosen on an invoice.
-
Only users with the permission “Finance Manager” or “Authorise own and my team’s supplier invoices” are able to authorise supplier invoices.
-
The supplier invoice is sent to one person at the time according to the order set up in the chosen authorisation flow.
-
If the user that has approved the invoice is included in the chosen authorisation flow he/she will be skipped over and the invoice will be sent for authorisation to the next person in line
-
In order for the invoice to be fully authorised it is required that minimum two different persons have approved/authorised and that the authoriser has sufficient amount limit.
-
The invoice will continue in the authorisation flow until this is fulfilled. Then it will stop and be fully authorised. Any following persons in the chosen authorisation flow will not be involved.
Booked/fully authorised
The supplier invoice will be fully authorised and booked once a person with sufficient amount limit has made their authorisation.
Payment
Once the supplier invoice has been fully authorised it will appear in the menu under “Pay”. It is visible for users with payment permission and they can now pay the invoice.
1. Permissions
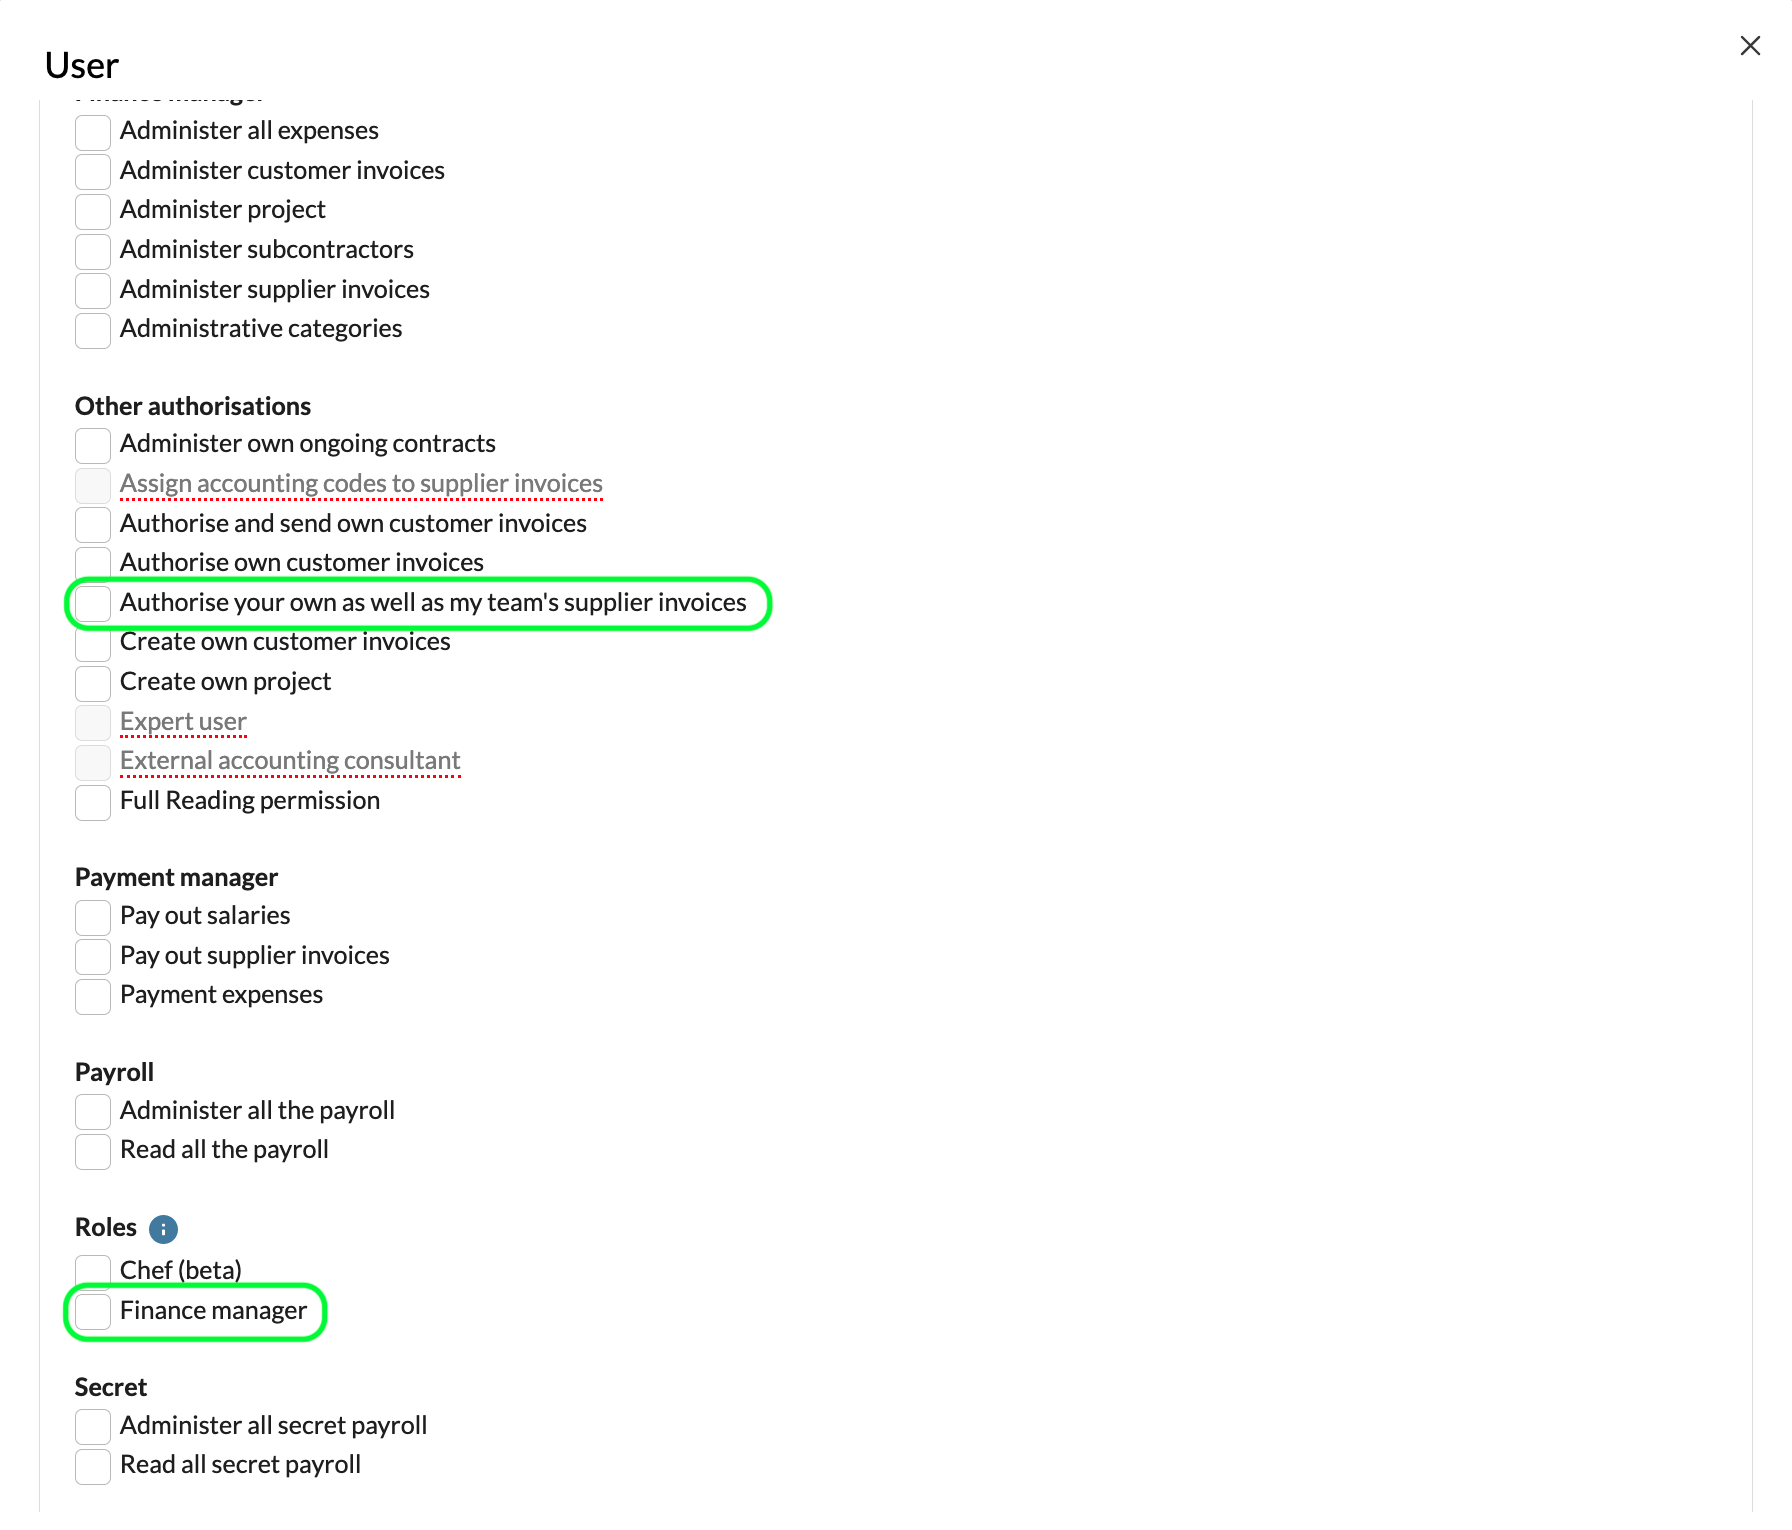
Give users who should be able to authorise supplier invoices the correct permission. It is required to have the permission “Finance Manager” or “Authorise own and my team’s supplier invoices”.
Users who should only make approvals do not need any extra permission.
2. Limit amount
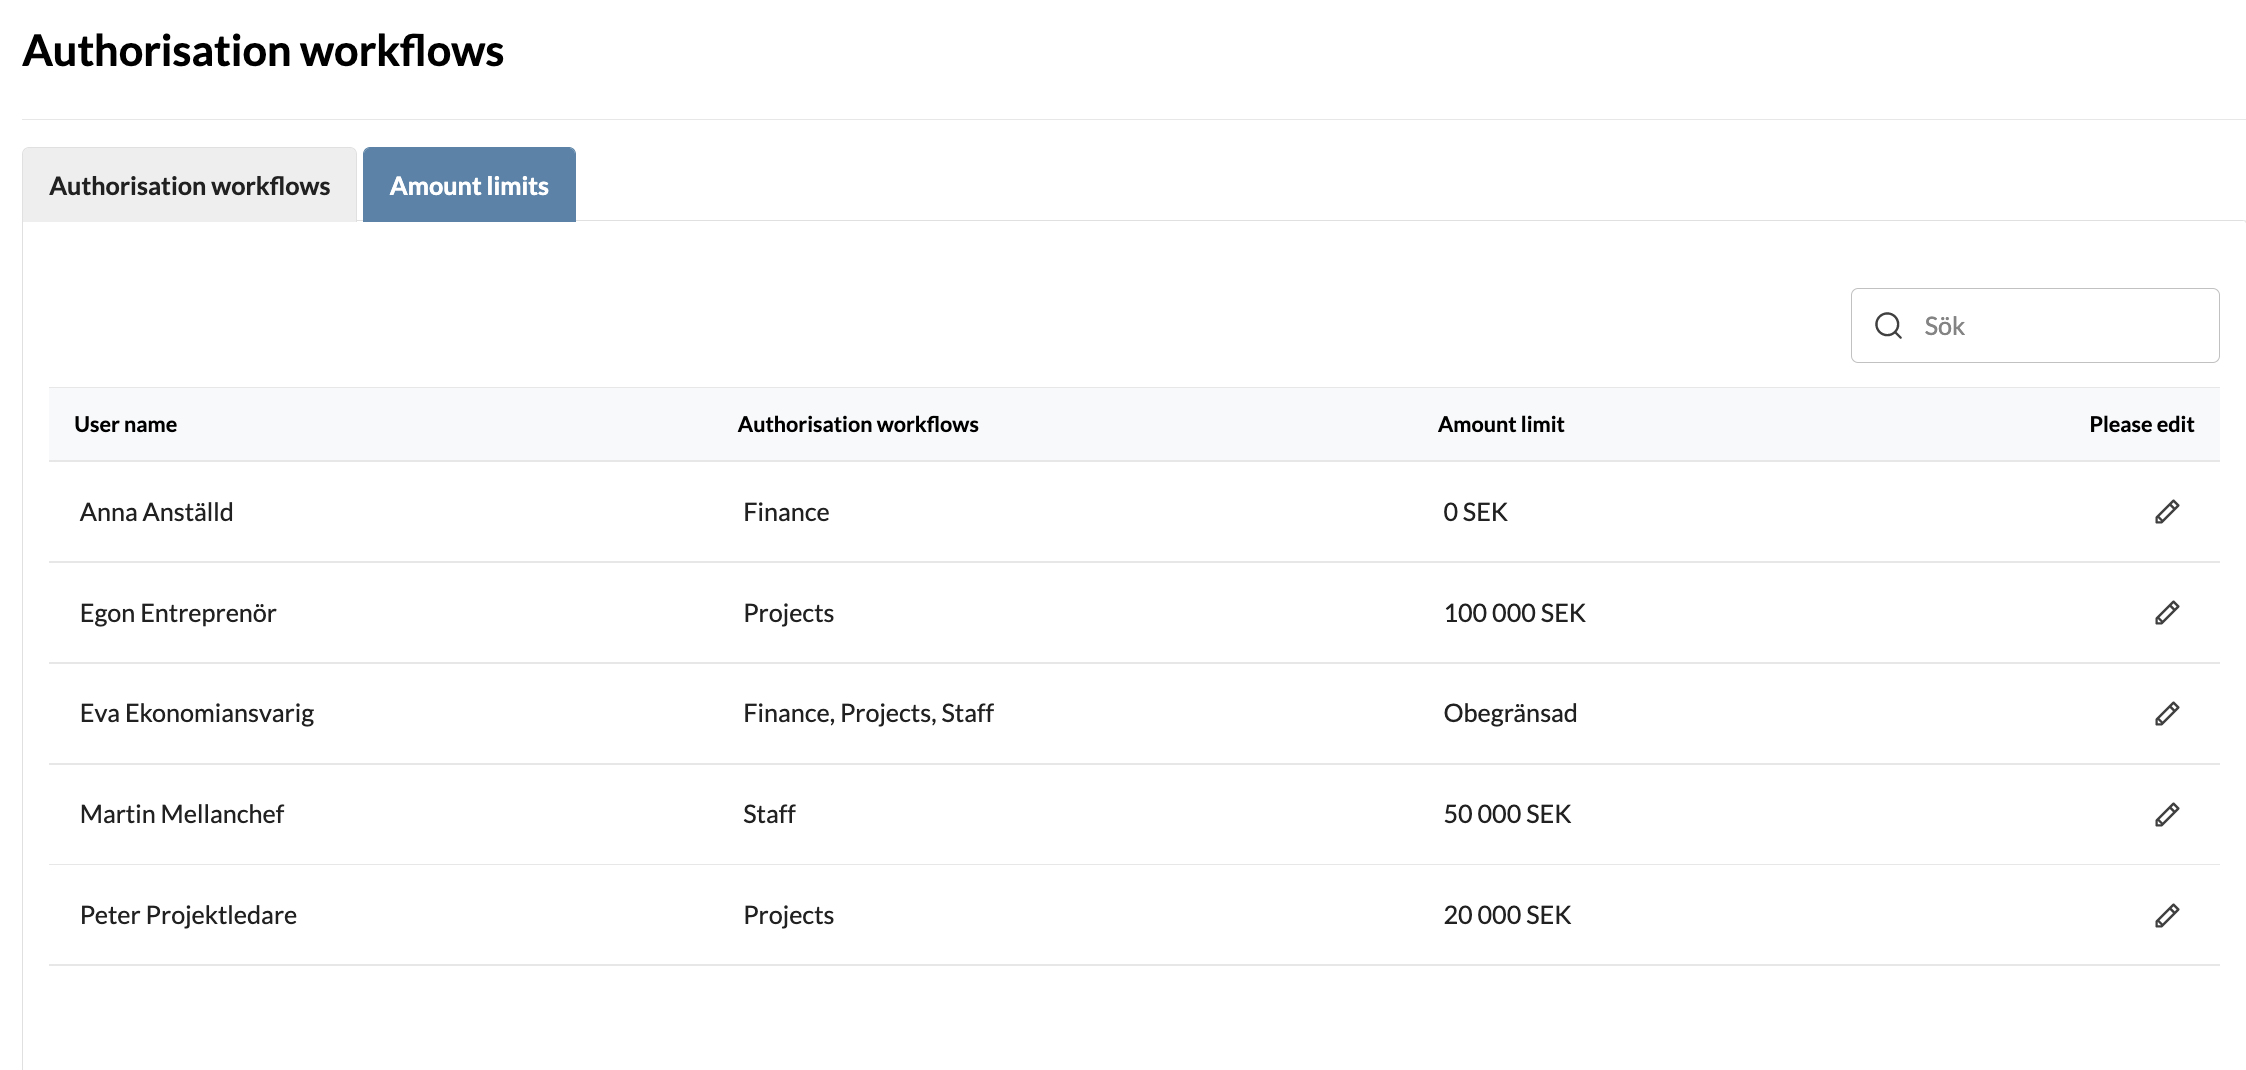
Under Settings in the top menu you find the option “Authorisation flows”. In the interface you will se a tab called “Amount Limits”. Enter/adjust the amount limit for each user by clicking the pen icon. https://my.kleer.se/web/secure/settings/supplierinvoicechains.xhtml
If no amount is set the user will have unlimited amount limit. I you would like the user to have 0 SEK please enter “0” in the field.
The limits are also valid for credit invoices. A user with 5 000 SEK limit also has permission to authorise credit invoices up to - 5 000 SEK.
All amounts are incl. VAT.
3. Create authorisation workflows
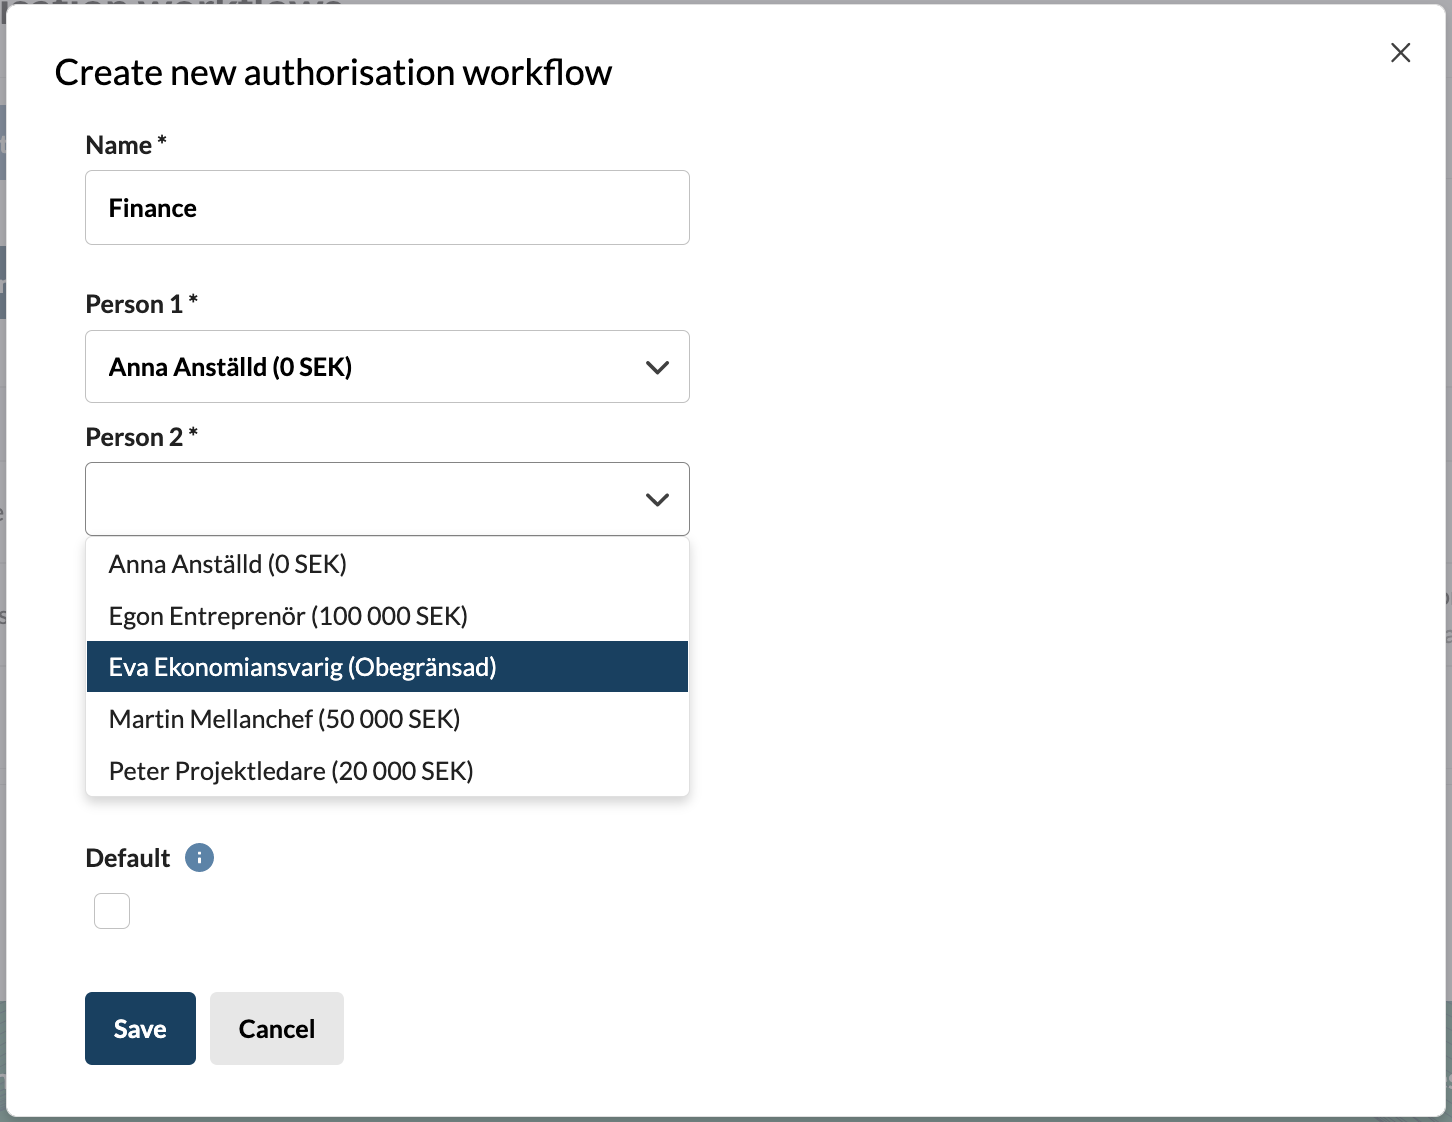
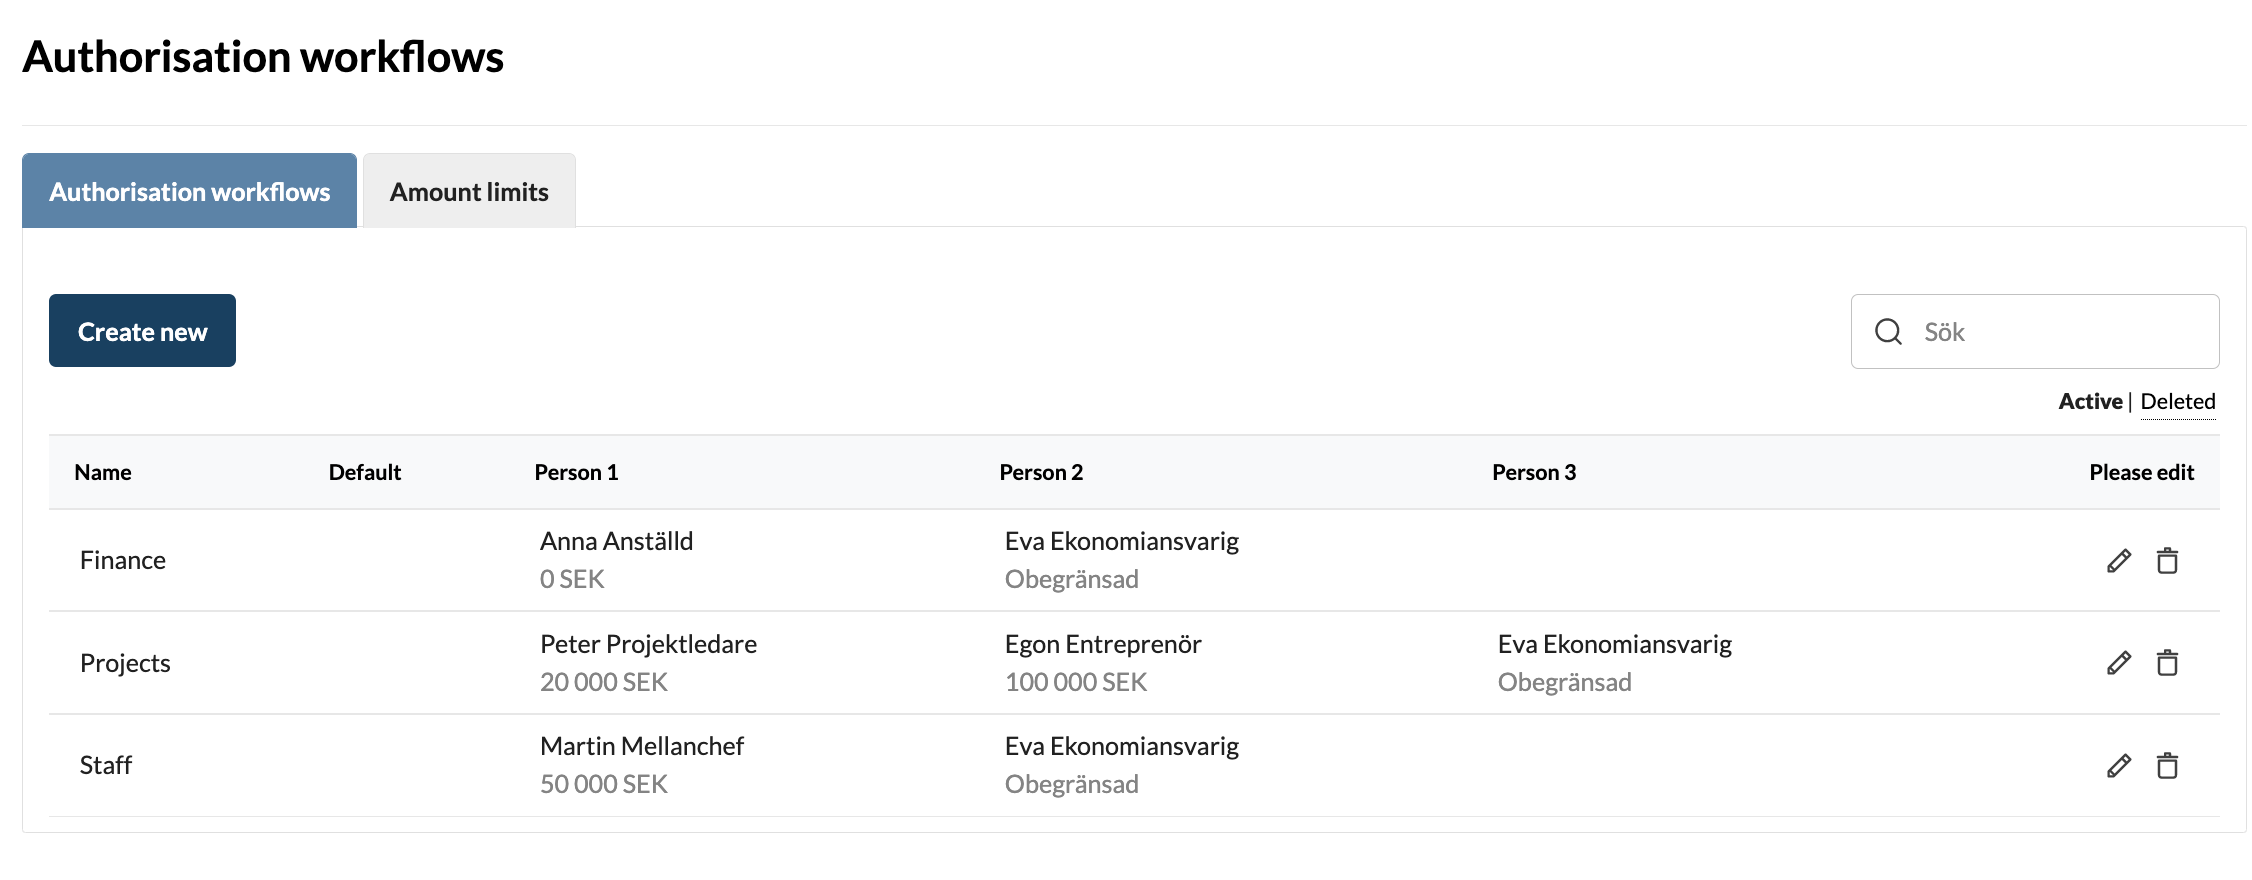
You create the authorisation workflows in the “Authorisation workflows” interface. You find it under Settings in the top menu.
https://my.kleer.se/web/secure/settings/supplierinvoicechains.xhtml
You can whenever you like edit or add more workflows.
Start the process
The process starts automatically if you are using the function to forward invoices to Your reference directly when they arrive. Once the user who is stated as Ypur reference has approved it will automatically be sent to the chosen authorisation workflow. If there is not an authorisation workflow chosen the invoice will be shown in the filter “To do” for users with permission to administrate supplier invoices.
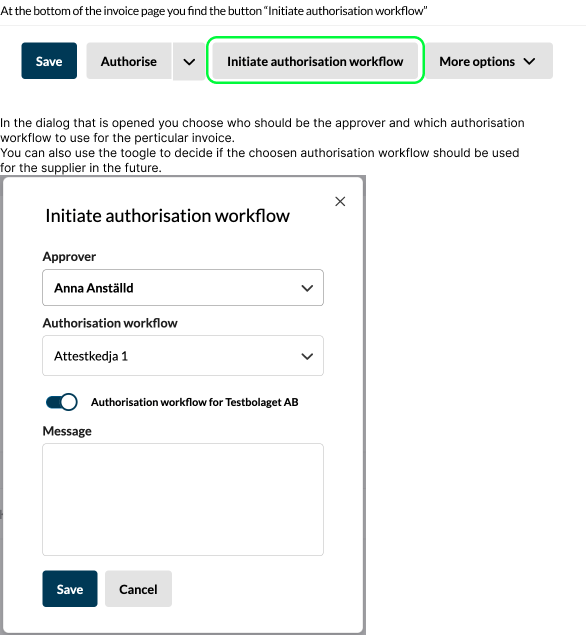
Administrators can also start the process manually by clicking the button “Inititate authorisation workflow” and choose a user as approver and an authorisation workflow.
Advice for more automation
-
If you have suppliers which invoices should always be handled the same way;
-
- State a user as Your reference on the suppliers in the supplier register. And make sure you are using the functionality for automatic forwarding to Your reference.
-
-
- State which authorisation workflow that should be used on eash supplier in the supplier register. This can also be updated continously by a Finance Manager by using the toggle when sending an invoice, then when the next invoice arrives from the supplier the authorisation workflow is already chosen.
-
-
State one of the authorisation workflows as standard if you have one main workflow. Then it will be sent to that workflow unless there is a supplier specific one.